Edge device onboarding
In this lab you are going to:
-
Create a VM that will act as edge device
-
Use the FDO enabled RHEL OSTree ISO image to install the edge device
-
Review the onboarding process and completion
-
Include changes into the device onboarding automation
The first step for this lab will be creating a VM that will act as edge device. If you are using a physical device you can of course skip this step.
After creating the VM, you will run the onboarding process. This process differs a little bit depending if you are using the All-in-One FDO server or the distributed approach.
In production, where you have the FDO services split in multiple servers, you will find 3 steps during the onboarding:
-
First boot and system preinstallation
-
Voucher distribution
-
Device Onboarding
Those steps will be explained below, but you need to know that, if you are using the All-in-One FDO server, these three steps will be reduced to just one, where the device is preconfigured, the vouchers are automatically distributed (because it’s just a local copy of files inside the same server), and the onboarding happens just right after the device’s first boot. Comments about this will be included in each section but please, bear this in mind.
Step 0 - Create the edge device VM
You need to create a VM with at least 2 vCPUs, 1.5GB memory, 20GB of disk and a NIC in a network with DHCP and Internet access.
Use the ISO installation method for the Operating System and point to the RHEL OSTree ISO that you created in the last LAB.
Before booting the VM, be sure that it will use UEFI instead of legacy BOOT (since the created ISO is prepared to use UEFI by default), otherwise you will get a code 0009 error while booting.
Lastly, if you configured in the Serviceinfo_API configuration file that you want to use a TPM, be sure that you add a virtual TPM in your VM or you will get the following error that will prevent FDO onboarding to complete:
 2022-11-30T11:33:32.516Z INFO  fdo_client_linuxapp::serviceinfo > Initiating disk re-encryption, disk-label: /dev/vda>
 2022-11-30T11:33:32.945Z INFO  fdo_client_linuxapp              > ServiceInfo failed, error: Error processing returne>
Caused by:
    0: Error executing clevis
    1: Error executing disk encryption for disk label /dev/vda4
    2: Error rebinding clevis
    3: Error binding clevis
    4: Failed to bind clevis: ExitStatus(unix_wait_status(256)), stdout: , stderr:
       A TPM2 device with the in-kernel resource manager is needed!
       Invalid input!
       Usage: jose jwe fmt -i JWE [-I CT] [-o JWE] [-O CT] [-c]

       Converts a JWE between serialization formats

         -i JSON --input=JSON     Parse JWE from JSON
         -i FILE --input=FILE     Read JWE from FILE
         -i -    --input=-        Read JWE from standard input

         -I FILE --detached=FILE  Read decoded ciphertext from FILE
         -I -    --detached=-     Read decoded ciphertext from standard input

         -o JSON --output=JSON    Parse JWE from JSON
         -o FILE --output=FILE    Read JWE from FILE
         -o -    --output=-       Read JWE from standard input
                                  Default: "-"

         -O JSON --detach=JSON    Parse JWE from JSON
         -O FILE --detach=FILE    Read JWE from FILE
         -O -    --detach=-       Read JWE from standard input

         -c      --compact        Output JWE using compact serialization

       Failed to import token from file.
       Error saving metadata to LUKS2 header in device /dev/vda4
       Unable to update metadata; operation cancelled
       Error adding new binding to /dev/vda4
You can adapt this virt-install command to install your VMs according to your needs:
virt-install --name=edge-device \
--vcpus=2 \
--memory=1536 \
--cdrom=<PATH TO RHEL OSTREE ISO> \
--disk size=20 \
--os-variant=rhel9.1 \
--boot uefi \
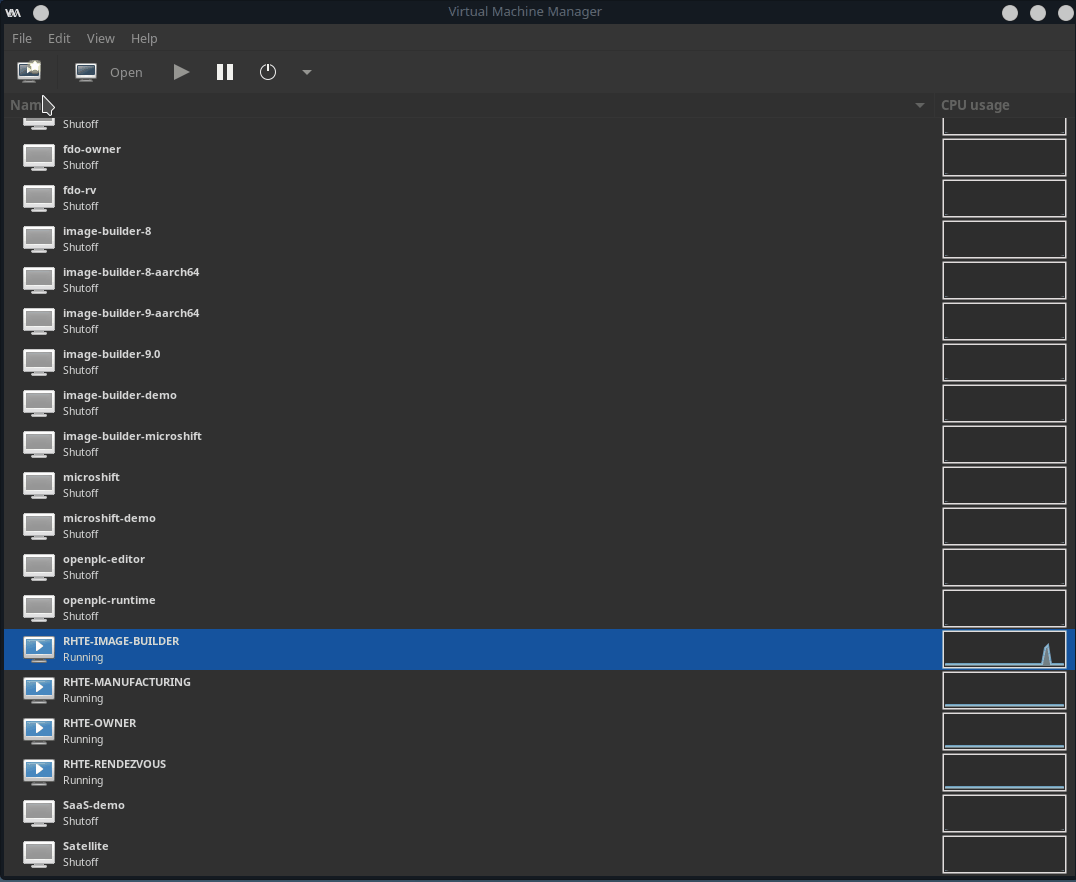
--tpm backend.type=emulator,backend.version=2.0,model=tpm-crbAnother options is virt-manager. Take a look at the animated GIF below if you want to review the whole VM creation process when using virt-manager.
Step 1 - Edge device’s first boot
Your OSTree RHEL installation ISO is ready for FDO onboarding. In production (remember, with the FDO distributed in multiple servers) you would have two options:
-
You can use that ISO at the manufacturing site (remember that the manufacturing location probably is different than the final edge location) to preinstall your systems and then distribute them to their final locations (at the owner’s site).
-
You can directly distribute the ISO to preinstall the devices at the owner’s site.
The first option is probably the better one, since you will need access to the Manufacturing server while performing the preinstallation and can skip that step at the owner’s site, where you might not have specialized people who, for example, know how to boot from ISO.
In this lab we could say that the manufacturing site and the final edge site are the same, so…we do not need to worry about it. You just need to boot the VM that you created with the OSTree RHEL ISO. This is an example of the console output shown during the first boot:
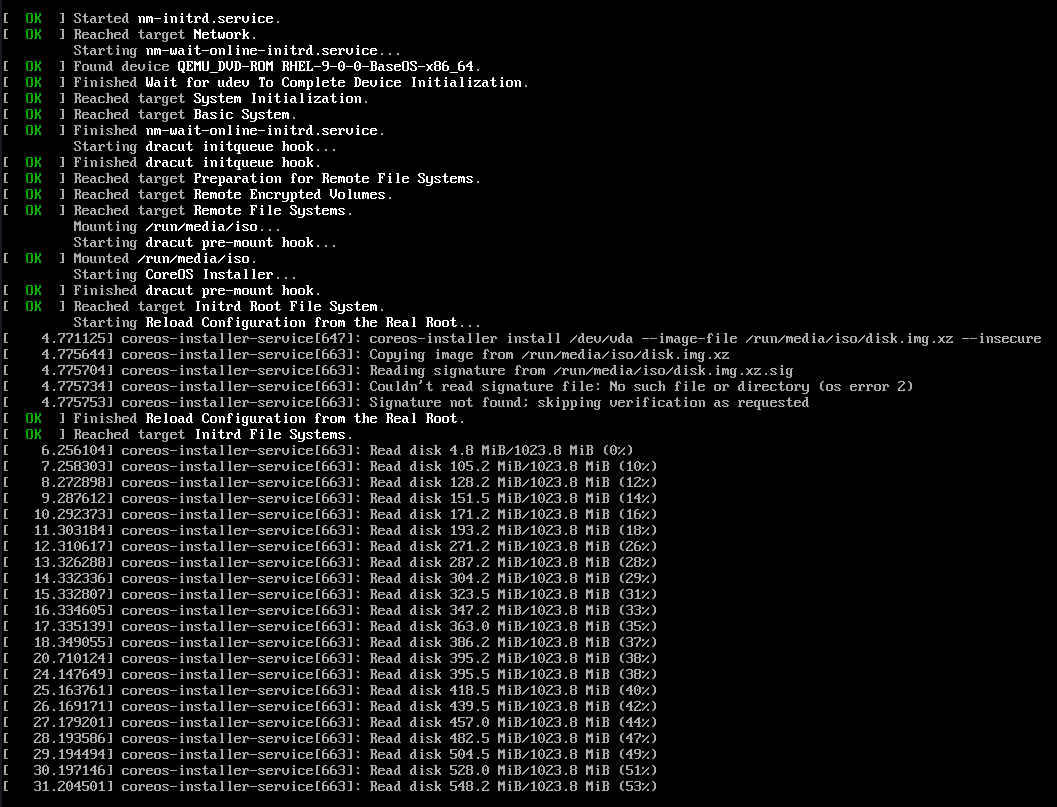
Once the device boots from that ISO, three main points are covered:
-
Include the required tools to “identify” the device such as the FDO client and a set of certificates and keys.
-
The Rendezvous server endpoint (URL) is included in the device
-
The Ownership Voucher is created.
During this phase, a pre-installed device is created with the certificates (that will authenticate the system) and with the FDO client ready to contact the Rendezvous and Owner servers in order to start the onboarding customization.
The Manufacturing server creates the owner voucher and store it in the owner_vouchers directory. You can connect to the Manufacturing server (or All-in-One server) and double-check that the voucher is created:
ls /etc/fdo/aio/stores/owner_vouchers/ls /etc/fdo/stores/owner_vouchers/ccc1b09c-1a0d-8c47-bf42-3a18901c00a8After the installation, the system will reboot directly from the hard disk and will try to start the boot-time automation to complete the system installation.
The configured onboarding automation steps won’t happen unless you have the All-in-One FDO server, because before being able to jump into the actual onboarding, you need to distribute the Vouchers.
In summary, after this step you have two different outputs: a preconfigured device and the Owner Voucher. Now you will have to physically send the device to the final destination (of course that’s in the real world, not in this lab) and, at the same time, copy the Owner Voucher as is explained in the next point.
Step 2 - Distribute the Vouchers
When using the All-in-One FDO server, the manufacturing server, Rendezvous server and the Owner onboarding server do share the same vouchers store (same directory) and hence the Manufacturing server does “report” the voucher automatically as soon as it creates it (remember that in case that you are using the all-in-one approach you can jump into the next step, Automatic onboarding)
In the real world where you probably have the FDO services in dedicated servers that does not happen, so you need to copy the files to "register" the new device that you have created, otherwise the device will ask for its onboarding instructions but since it’s not registered, it will get nothing.
You need to distribute the Voucher that has been created in the Manufacturing server during the edge device first boot, to both the Rendezvous and the Owner server.
Jump into the Manufacturing server and copy the Voucher to the Rendezvous server:
scp /etc/fdo/stores/owner_vouchers/<VOUCHER ID> root@<RENDEZVOUS SERVER IP>:/etc/fdo/stores/rendezvous_registered/Again, from the Manufacturing server, copy the file to the Owner server:
scp /etc/fdo/stores/owner_vouchers/<VOUCHER ID> root@<OWNER SERVER IP>:/etc/fdo/stores/owner_vouchers/Step 3 - Automatic onboarding
Now that everything is prepared, it’s time to reboot again the edge device.
During this phase, the FDO client will identify itself into the Rendezvous server with the keys that were provided during the device preinstallation phase, create a secure channel to the Owner server and perform the automation configured in the service API service configuration file.
Before checking anything on the system you need to log in using the user that you configured in the RHEL OSTree image blueprint (admin if you used the defaults). If you configured your system’s SSH Public key it won’t ask for any password.
Once you are in the Edge Device, you can follow the FDO client logs until its completion (remember to break the command with CTL-C):
journalctl -u fdo-client-linuxapp -fDec 13 05:05:41 edge-3e92db36 subscription-manager[2233]: Added subscription for product 'Red Hat OpenStack Beta for IBM Power LE'
Dec 13 05:05:41 edge-3e92db36 subscription-manager[2233]: Added subscription for product 'Red Hat JBoss Core Services'
Dec 13 05:05:41 edge-3e92db36 subscription-manager[2233]: Added subscription for product 'Red Hat Gluster Storage Web Administration (for RHEL Server)'
Dec 13 05:05:41 edge-3e92db36 subscription-manager[2233]: Added subscription for product 'Red Hat S-JIS Support (for RHEL Server) - AUS'
Dec 13 05:06:22 edge-3e92db36 podman[3231]: 2022-12-13 05:06:22.523403789 -0500 EST m=+0.180416078 system refresh
Dec 13 05:06:44 edge-3e92db36 fdo-client-linuxapp[1138]: 2022-12-13T10:06:44.873Z INFO fdo_client_linuxapp::serviceinfo > Initiating disk re-encryption, disk-label: /dev/vda4, pin: tpm2, config: {}, reencrypt: true
Dec 13 05:06:45 edge-3e92db36 fdo-client-linuxapp[1138]: 2022-12-13T10:06:45.819Z INFO fdo_client_linuxapp > Secure Device Onboarding DONE
Dec 13 05:06:45 edge-3e92db36 systemd[1]: fdo-client-linuxapp.service: Deactivated successfully.
Dec 13 05:06:45 edge-3e92db36 systemd[1]: Finished FDO client.
Dec 13 05:06:45 edge-3e92db36 systemd[1]: fdo-client-linuxapp.service: Consumed 51.257s CPU timeThe FDO client should be executed as the system starts, bu you can also re-launch it by restarting the fdo-client-linuxapp service:
systemctl restart fdo-client-linuxapp.serviceYou will get logs that will depend on your configured onboarding automation and it will indicate that everything when OK with a Secure Device Onboarding DONE message as shown above.
If you just see Starting FDO client… but nothing else happens, probably there is a configuration issue somewhere. Start by checking the Owner server logs and Serviceinfo_API configuration and listening ports.
If you see something like "No usable device credential located", that could mean that the RHEL ISO image was created but the FDO Manufacturing server was not available during the image creation, so the required certificates and keys were not introduced in the image. If that’s the case, jump into the Image Builder and review the Manufacturing URL in the blueprint-fdo file. Check that its appears as http://<manufacturing ip>:<manufacturing port> and also check that the manufacturing port (by default 8080) is listening in the Manufacturing server using ss -ltn. If the Manufacturing server is working and is specificated in the blueprint file, then check that the device disk configured in the blueprint is also correct. If you find anything wrong… you will need to create a new ISO.
Disk encryption was one of the options that you could configured in the Serviceinfo_API service. If encryption/re-encryption was required, you could also check if that’s done now:
lsblkNAME MAJ:MIN RM SIZE RO TYPE MOUNTPOINTS
sr0 11:0 1 1024M 0 rom
vda 252:0 0 20G 0 disk
├─vda1 252:1 0 1M 0 part
├─vda2 252:2 0 127M 0 part /boot/efi
├─vda3 252:3 0 384M 0 part /boot
└─vda4 252:4 0 19.5G 0 part
└─luks-0f4d6096-37cb-4eb8-88d6-abac5cd73db9 253:0 0 19.5G 0 crypt
└─rootvg-rootlv 253:1 0 9G 0 lvm /var
/usr
/
/sysrootAt this moment your onboarding is done!, you can start reviewing if the automation that you configured actually worked as you expected.
Checking the edge device onboard
If you prepared your onboarding automation you will need to know by your own how to check if it worked or not depending on what you configured.
In case you used the provided onboarding automation example, in this section you can see how to check that everything went OK.
The example automation runs several scripts and copy multiple files, but mainly you can check:
-
That the system has been renamed with a random hostname
-
That the system is subscribed to the Hybrid Cloud Console and appears in Insights.
-
That you can run an OpenSCAP compliance report
-
That you have Cockpit and KVM installed
-
That a Greenboot script has been configured
Let’s start checking the Edge device hostname (your hostname will be different):
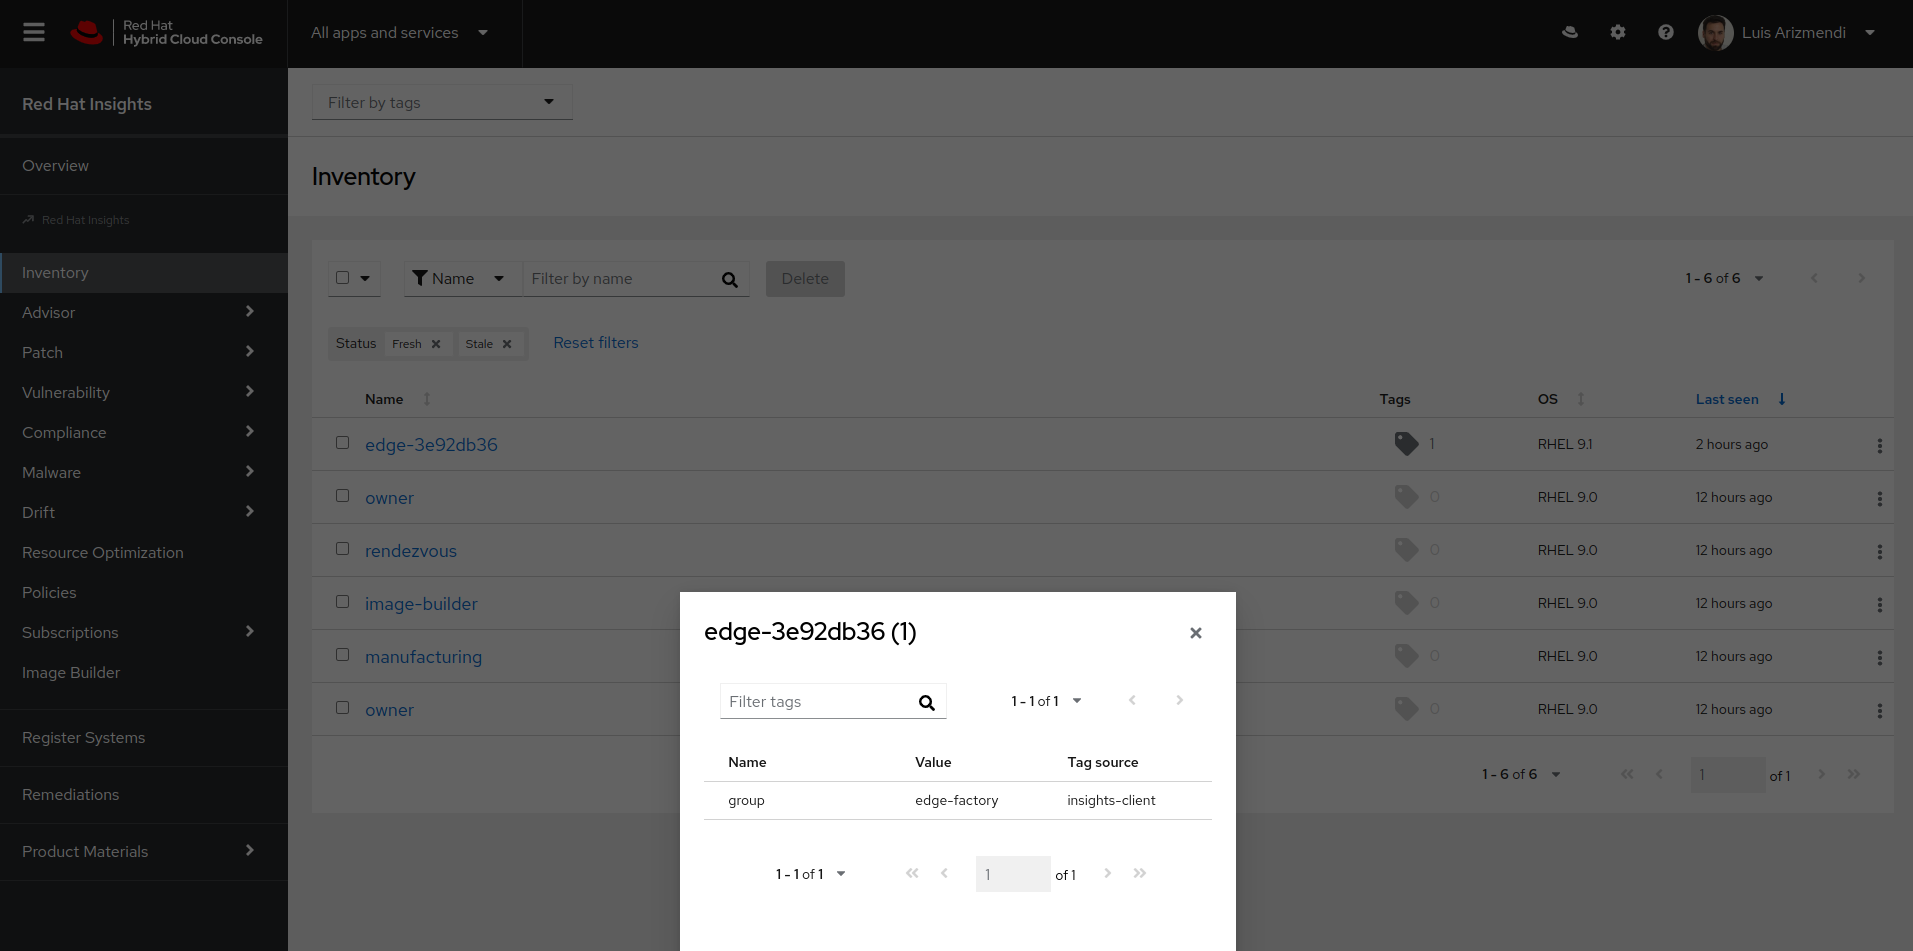
Now you can also Check Insight inventory in the Hybrid Cloud Console and also review if a TAG with the name edge-factory has been configured (in my case you can see that the FDO servers and the Image Builder are there as well)
One remark, in order to subscribe any RHEL system, you need the user and password, and what is important about FDO is that we provided such secrets without including them on the ISO image, they are present just in a managed and secured environment (Owner server) and they have been downloaded from there using a secure channel.
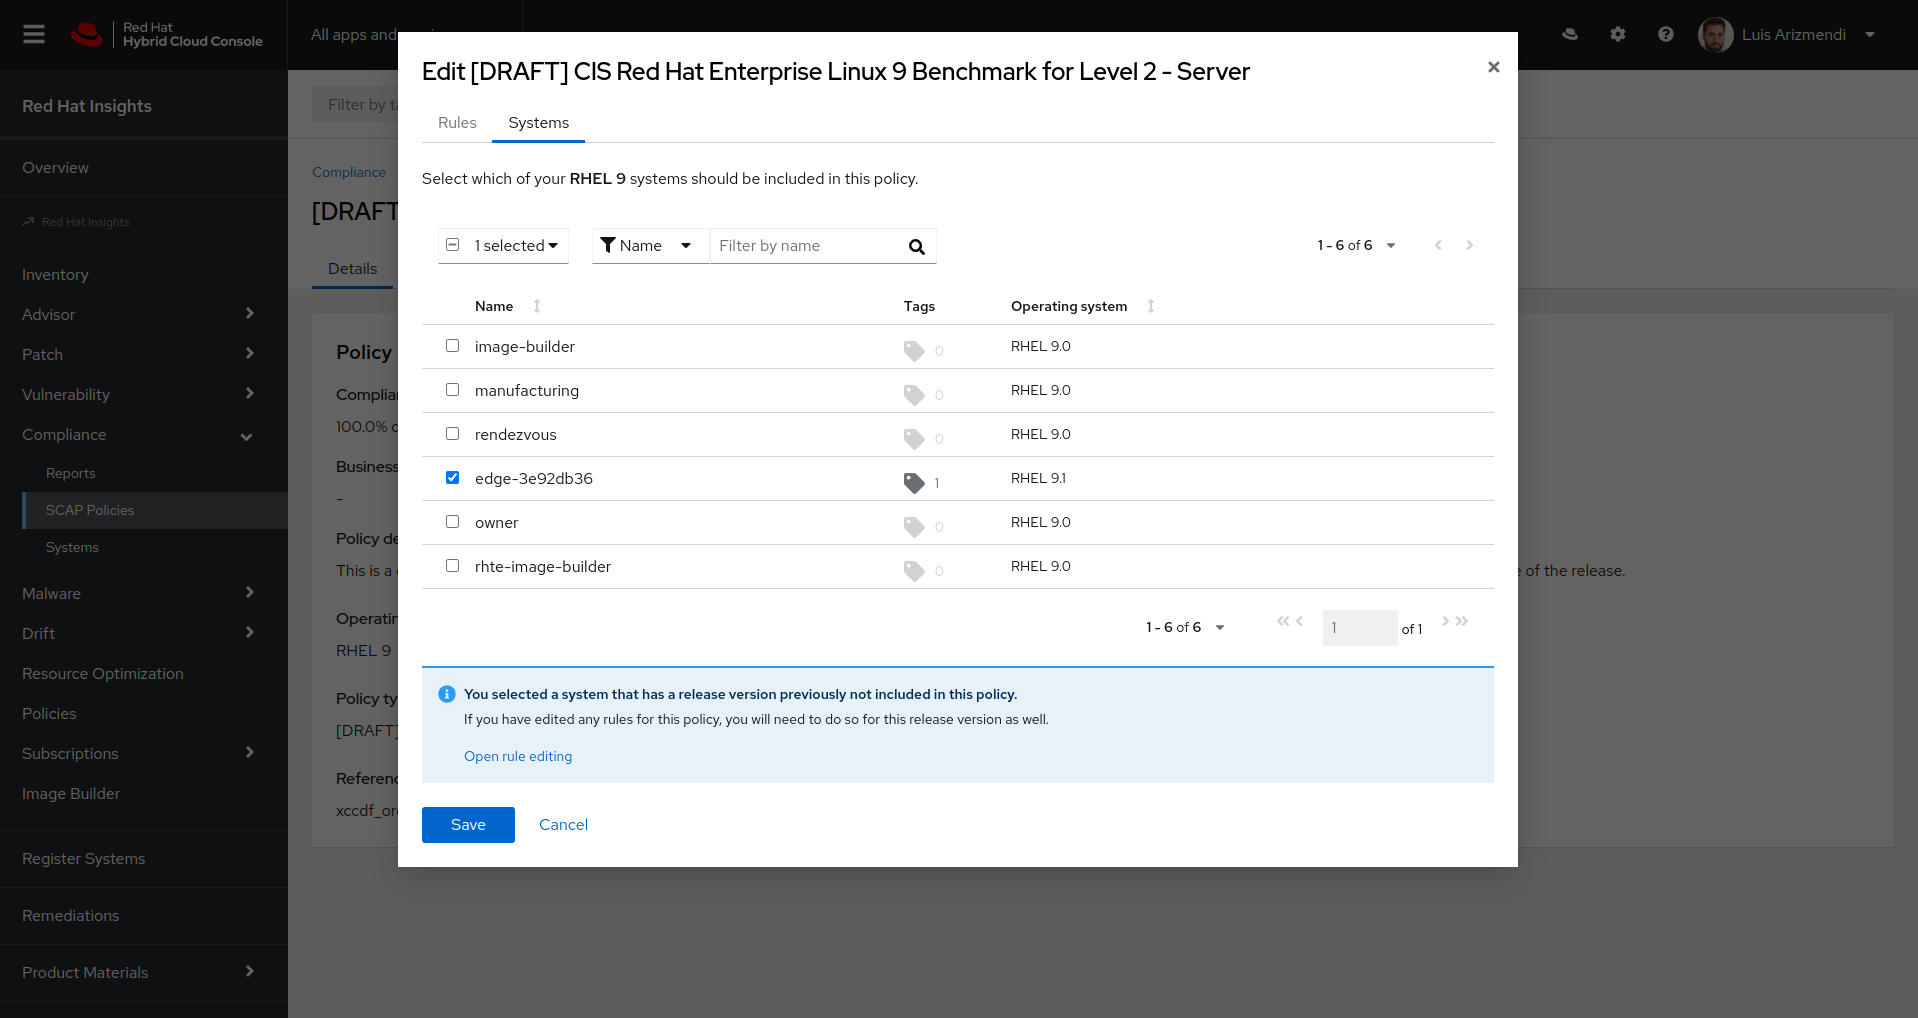
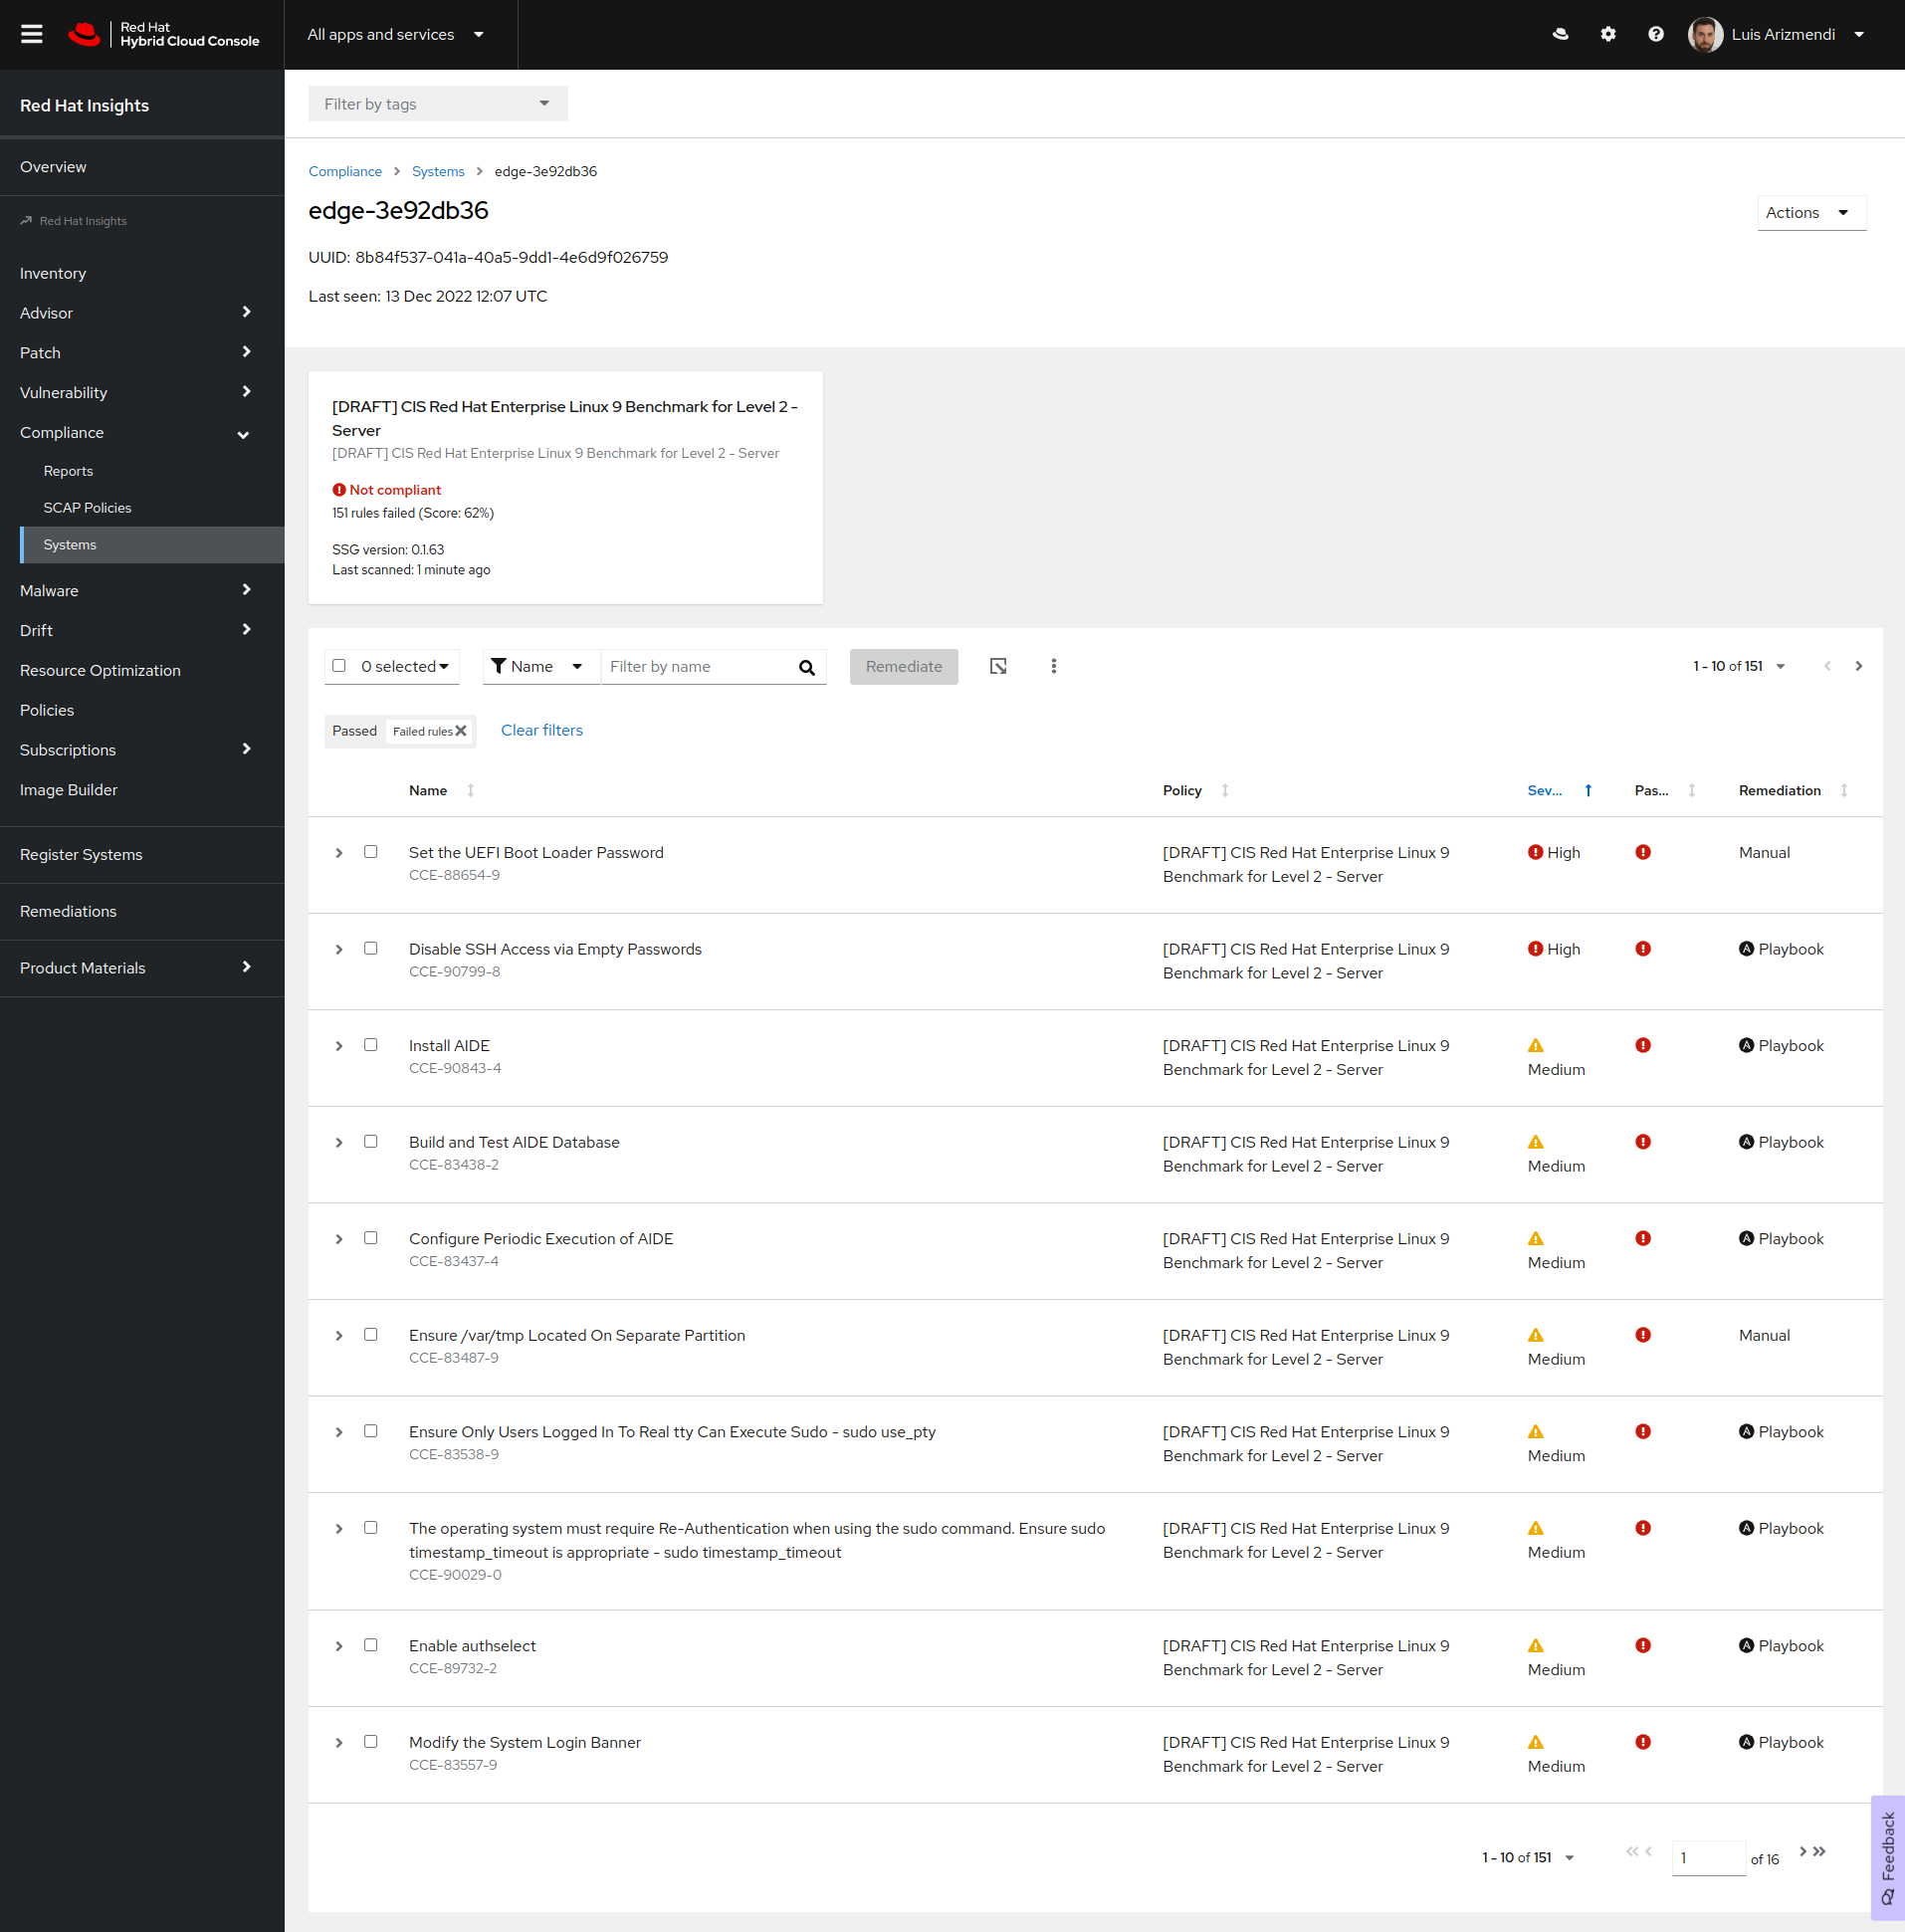
In order to get the SCAP compliance report, your system needs to be part of a SCAP policy. You will need to first go to the Policy page and include the new edge system (if you don’t have any SCAP Policy pre-configured you need to create one):
Once the system is added to a policy, you can wait until the SCAP client is executed… but that could be up to 24 hours, so it’s better to force it by running this command on the Edge Device:
sudo insights-client --compliance#System uses SSG version 0.1.63
#Running scan for xccdf_org.ssgproject.content_profile_cis... this may take a while
#Uploading Insights data.
#Successfully uploaded report for edge-3e92db36When the command finishes, you have access to the report in the Hybrid Console:
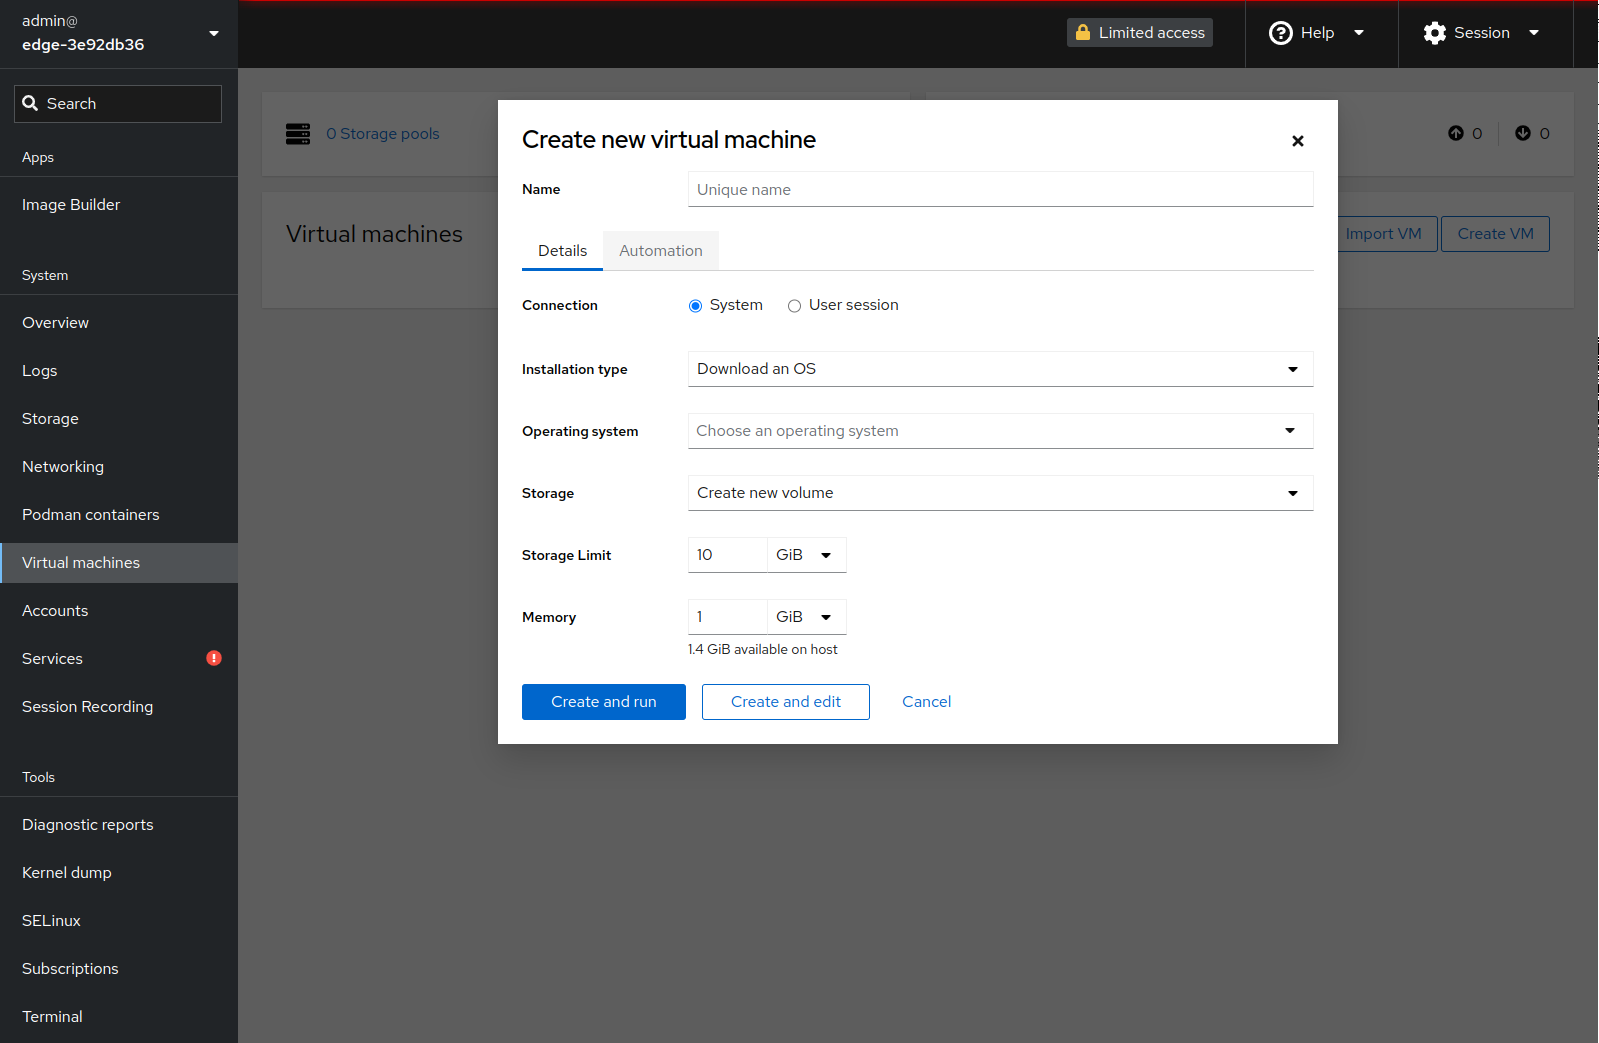
Another thing to be checked is if KVM and Cockpit (with VM management) was installed, so you have to visit https://<EDGE DEVICE IP>:9090 and review the VM management
Lastly you can check if a Greenboot script has been created on the system. Greenboot is a cool feature on OSTree RHEL systems that is used to automatically rollback upgrades in case something fails, if this is new for you, you should learn more about it.
Updating the onboard automation
You completed the onboarding, everything is OK, but what happens if you realize that you need to include additional customizations or change anything on the configured automations for the upcoming device onboardings?
We find three different "kind" of changes here:
-
Modify the content of an existing file that is copied to the systems during the onboarding
-
Modify the commands or files copied during the onboarding
-
Modify the base image (Software included by default in the Edge Device)
Taking a look at the provided onboarding automation, an example for the first type of change could be modifying the Greenboot file. For example, we would like that the Greenboot script, instead of reviewing that a file exists in /root/mustfail `(variable `FILE=/root/mustfail in the 01_check_demo_file.sh script), it checks a different path.
For this kind of change, you only have to directly modify the file in the Owner server (if you followed the lab steps you will find it in /etc/fdo-configs/device0/etc/greenboot/check/required.d/01_check_demo_file.sh) and the following devices that perform the FDO onboarding will get the new file. You don’t need to touch anything else, including the serviceinfo-api-server.yml because you are not modifying the name or the PATH to the Greenboot file, only its contents.
If you need to modify the commands or files copied during the onboarding (for example, you want to copy additional file into your systems while onboarding them) you will need to change the /etc/fdo/serviceinfo-api-server.yml file in the Owner server including the required new lines pointing to the new file (and the file should be created in the path configured) and lastly, and very important, you need to restart the Serviceinfo_API server in order to make that change effective.
The last kind of change is different. If you want to change the base OSTree RHEL image by adding (or removing) RPM packages, you will need to use the Image Builder to create a new Blueprint to generate an updated OSTree repo/image and a new ISO. The steps are similar… but not equal to the ones that you performed during the lab, since you want to update an existing OSTree repo, not create a new one.
OSTree RHEL image management is out of the scope of this lab, so you can get this task as an additional homework, but if you want some hints, you can check the official documentation or this script.
Edge device onboarding Lab summary
In this lab you have:
-
Created a VM that will act as edge device
-
Used the FDO enabled RHEL OSTree ISO image to install the edge device
-
Reviewed the onboarding process and completion
-
Included changes into the device onboarding automation
CONGRATULATIONS!, you finished the last LAB, and I hope that you enjoyed it.