Image Baking
By now you should already be familiar with building a standardized OS using Image Mode, but here is a recap just in case.
Image mode is a new approach to operating system (OS) deployment that lets users build, deploy, and manage Red Hat Enterprise Linux as a bootc container image. Bootc is the original project on which this is built on Bootc.
Why was this project started at all? The original Docker container model of using "layers" to model applications has been extremely successful. This project aims to apply the same technique for bootable host systems - using standard OCI/Docker containers as a transport and delivery format for base operating system updates.
Every tool and technique that you already know and use for creating application base images can now apply to the host Linux OS.
This clearly reduces complexity across the enterprise by letting development, operations, and solution providers use the same container-native tools and techniques to manage everything from applications to the underlying OS. Use can use Image Mode for RHEL to build, test, and deploy operating systems by using the same tools and techniques as application containers. Image mode for RHEL is available by using the registry.redhat.io/rhel9/rhel-bootc bootc image. The RHEL bootc images differ from the existing application Universal Base Images (UBI) in that they contain additional components necessary to boot that were traditionally excluded, such as, kernel, initrd, boot loader, firmware, among others.
One of the most obvious ways to use a bootable container as an operating system is to build it into a disk image. The new Bootc Image Builder project is a tool that does exactly that. Depending on your needs, it can generate different types of disk images, including:
-
raw: common image format used by many virtualization tools
-
qcow: an image format primarily used by QEMU
-
iso: for creating bootable media using tools like Balena Etcher
-
vmdk: for creating VMs using VMWare Workstation or ESXi
-
ami: for creating virtual servers on Amazon EC2
These types of disk images provide lots of options to deploy bootable containers, from booting from a USB drive, starting a virtual machine, or deploying virtual servers to the cloud.
The benefits of using containers do not end here. These are some of the most important ones:
-
Container images are easier to understand and use than other image formats and are fast to build
-
Consolidate process, infrastructure, and release artifacts and reuse the same tooling available for distributing applications
-
Immutable updates: just as containerized applications are updated in an immutable way, with image mode for RHEL, the operating system is also.
-
Portability across hybrid cloud environments across physical, virtualized, cloud, and edge environments.
-
Building container images: you can configure your operating system at a build time by modifying the Containerfile. You can automate the build process by using CI/CD pipelines.
-
Versioning, mirroring, and testing container images: you can version, mirror, introspect, and sign your derived bootc image by using the container tools of your choice.
-
Updating your operating system: the system supports in-place transactional updates with rollback after deployment. Automatic updates are on by default. As the updates are transactional, a reboot is required to apply them.
In the following sections we will go through the following phases:
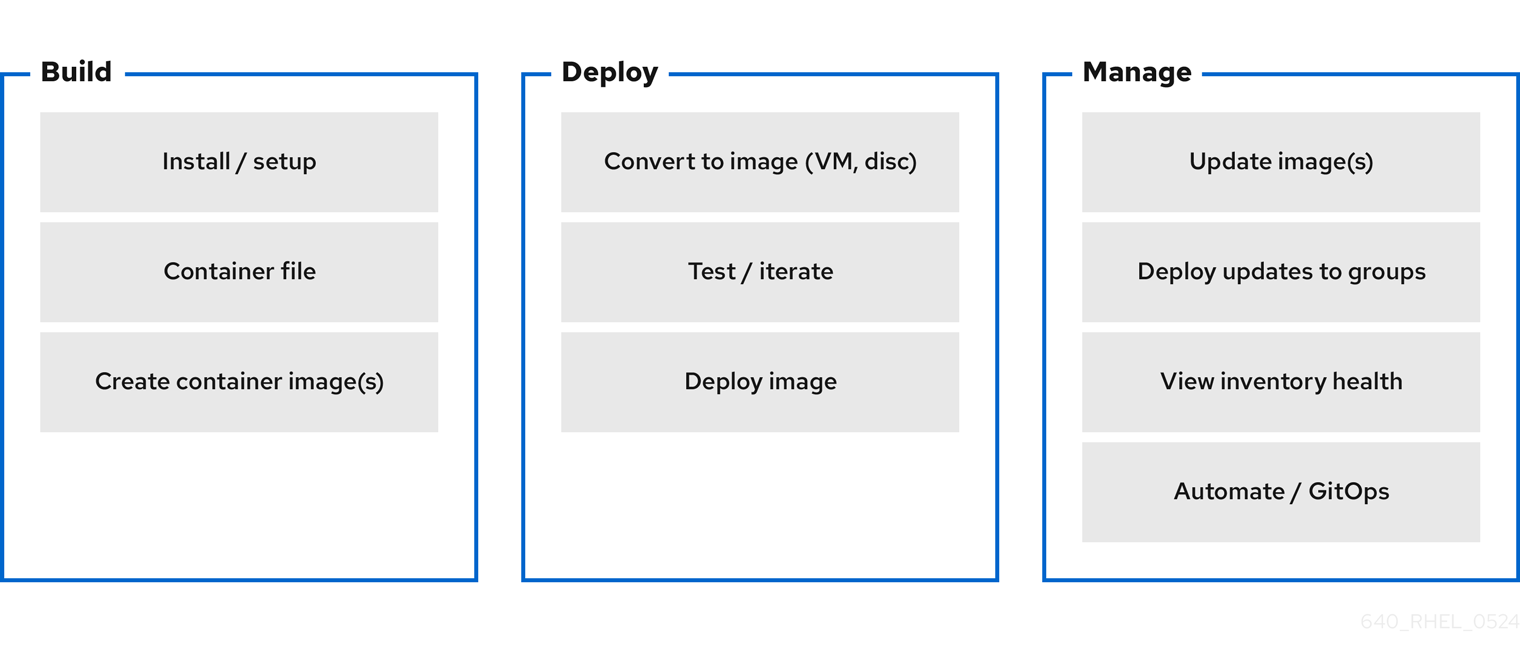
Image Build
Since bootc image is available both for x86-64 and aarch64 architectures we are able to leverage this technology on the Local Edge Device in front of you.
The device has already been flashed to the latest stable and supported by Red Hat JetPack (6.0). Nvidia JetPack provides a full development environment for the Jetson platform including Jetson Linux with BSP, kernel, RootFS, etc., the NVIDIA AI stack with hardware accelerated libraries, SDKs, and frameworks, and Jetson Platform Services for application development.
A RHEL is already installed on the Nvidia device but it is RPM based. Since you don’t know yet the IP address or the credentials to the Nvidia Device and you (as Platform Specialist) would like to standardize and simplify platform building and deployment, you are going to leverage bootc and create and deploy a new standard image on top of it.
We will use as starting point a prebuilt bootc-compatible image and we will build on it, with the objective to include a way to allow us to reach the Local Edge Device remotely, without plugging into the serial console or into the DisplayPort.
You will find this base container image on the Edge Container Registry (Gitea) here: 192.168.2.200:5000/gitea/nvidia:0.0.1
Make sure to pull the container image with sudo from the Shared Edge Builder since the last step of building the bootc image requires sudo permissions.
|
Let’s analyze the base container image provided:
FROM registry.gitlab.com/redhat/rhel/sst/orin-sidecar/nvidia-jetson-sidecar/rhel-9.4:36.3.1-20240516220919

ARG USHIFT_VER=4.18
RUN dnf config-manager \
        --set-enabled rhocp-${USHIFT_VER}-for-rhel-9-$(uname -m)-rpms \
        --set-enabled fast-datapath-for-rhel-9-$(uname -m)-rpms
RUN dnf install -y firewalld microshift && \
    systemctl enable microshift && \
    dnf clean all

# Create a default 'redhat' user with the specified password.
# Add it to the 'wheel' group to allow for running sudo commands.
ARG USER_PASSWD
RUN if [ -z "${USER_PASSWD}" ] ; then \
        echo USER_PASSWD is a mandatory build argument && exit 1 ; \
    fi
RUN useradd -m -d /var/home/redhat && \
    usermod -G video redhat && \
    echo "redhat:${USER_PASSWD}" | chpasswd

# Mandatory firewall configuration
RUN firewall-offline-cmd --zone=public --add-port=22/tcp && \
    firewall-offline-cmd --zone=trusted --add-source=10.42.0.0/16 && \
    firewall-offline-cmd --zone=trusted --add-source=169.254.169.1

# Create a systemd unit to recursively make the root filesystem subtree
# shared as required by OVN images
RUN cat <<EOF > /etc/systemd/system/microshift-make-rshared.service
[Unit]
Description=Make root filesystem shared
Before=microshift.service
ConditionVirtualization=container
[Service]
Type=oneshot
ExecStart=/usr/bin/mount --make-rshared /
[Install]
WantedBy=multi-user.target
EOF
RUN systemctl enable microshift-make-rshared.service
In the Containerfile in order:
-
we are basing the image on RHEL 9.4
-
we are including Microshift as well, as we will be using it in the last part of this lab to deploy applications
-
we are creating a
redhatuser, and adding that user to thevideogroup, since it will allow him to use GPU resources -
we are afterwards opening the needed firewall ports
-
we are finally making root filesystem shared as required by OVN containers
What we are going to add to the image is:
-
administrative rights to the
redhatuser, change the user password and enable passwordless escalation -
install and enable cockpit interface for remote graphical management
-
a script to notify you of the acquired IP address
-
a customization to also print the IP address on the console (in case you do want to attach to the DP)
Since the first 2 points should be fairly easy to include, I’ll leave them as exercise for the reader, but you can find them as snippets below.
Click to reveal it
...
RUN usermod -aG wheel redhat
RUN echo "redhat:R3dh4t1!" | chpasswd
RUN echo "%wheel        ALL=(ALL)       NOPASSWD: ALL" > /etc/sudoers.d/wheel-sudo
...
RUN dnf -y install cockpit && dnf -y clean all && systemctl enable cockpit.socket
...
For the third point, we are going to use the following script and add that as a service in our Containerfile so that it is started at boot time
RUN cat <<EOF > /var/tmp/network-info.sh
#!/bin/bash
sleep 5
conn_name=\$(nmcli -t -f NAME con show | head -n 1)
device_name=\$(nmcli -t -f GENERAL.DEVICES con show "\$conn_name" | head -n 1 | cut -d: -f2)
IP_ADDRESS=\$(nmcli -t -f IP4.ADDRESS con show "\$conn_name" | head -n 1 | cut -d: -f2 | cut -d/ -f1)
MAC_ADDRESS=\$(nmcli -g GENERAL.HWADDR device show "\$device_name" | tr -d '\\')
MAC_ADDRESS_FORMAT=\$(echo "\$MAC_ADDRESS" | tr -d ':')

if [ -z "\$IP_ADDRESS" ] || [ -z "\$MAC_ADDRESS" ] ; then
    echo "One or more required variables are empty. Script failed."
    exit 1
fi

JSON="{ \
\"body\":\"\$IP_ADDRESS\", \
\"title\": \"YOUR-GROUP-NUMBER\" \
}"

/usr/bin/curl -k -H 'Content-Type: application/json' -u YOUR-GITEA-USER:YOUR-GITEA-pass --data "\$JSON" http://GITEA-URL/api/v1/repos/YOUR-GITEA-USER/inventories/issues
EOF

RUN chmod +x  /var/tmp/network-info.sh

RUN cat <<EOF > /etc/systemd/system/network-info.service
[Unit]
Description=Register Network Info onto Gitea
After=network.target
After=connect-wifi.service
ConditionPathExists=!/var/tmp/net-info-registered

[Service]
Type=simple
ExecStart=/bin/bash -c 'while true; do /var/tmp/network-info.sh && /usr/bin/touch /var/tmp/net-info-registered && break; done'

[Install]
WantedBy=default.target
EOF

RUN systemctl enable network-info.service
For the last point we are going to leverage the issue file in Linux, and add the following:
IP: \4| To build this first new image you are going to use the Shared Edge Builder available on this network at the following address 192.168.2.128 since we are assuming that you don’t know yet how to reach the Local Edge Device you have in front of you (and you can build images using bootc only on same as target device architecture devices). Username and password for the Shared Edge Builder are USERNAME : PASSWORD |
|
After this first module, you might want to use your Local Edge Device to build the next iteration of the system image.
To do that you would need a fully subscribed RHEL 9 System, with the same system architecture as the target device (so aarch64). So for this to happen you would need to include Virtualization in the Containerfile, so tht you can run a Virtualized OS dedicated to building images. With these packages enabled you can create a full RHEL9 VM, running on KVM, that bakes new images. |
You can find the additional packages needed in the Containerfile below.
RUN dnf -y install qemu-kvm libvirt virt-install && dnf -y clean all
RUN for drv in qemu network nodedev nwfilter secret storage interface; do systemctl enable virt${drv}d{,-ro,-admin}.socket; done
You can find the complete Containerfile here:
FROM {container-registry-gitea}/{container-registry-gitea-user}/nvidia:0.0.1

RUN dnf -y install cockpit && dnf -y clean all && systemctl enable cockpit.socket

RUN dnf -y install qemu-kvm libvirt virt-install && dnf -y clean all
RUN for drv in qemu network nodedev nwfilter secret storage interface; do systemctl enable virt${drv}d{,-ro,-admin}.socket; done

# Modifying default user
RUN usermod -aG wheel redhat
RUN echo "redhat:R3dh4t1!" | chpasswd
RUN echo "%wheel        ALL=(ALL)       NOPASSWD: ALL" > /etc/sudoers.d/wheel-sudo

# Network info script
RUN cat <<EOF > /var/tmp/network-info.sh
#!/bin/bash
sleep 5
conn_name=\$(nmcli -t -f NAME con show | head -n 1)
device_name=\$(nmcli -t -f GENERAL.DEVICES con show "\$conn_name" | head -n 1 | cut -d: -f2)
IP_ADDRESS=\$(nmcli -t -f IP4.ADDRESS con show "\$conn_name" | head -n 1 | cut -d: -f2 | cut -d/ -f1)
MAC_ADDRESS=\$(nmcli -g GENERAL.HWADDR device show "\$device_name" | tr -d '\\')
MAC_ADDRESS_FORMAT=\$(echo "\$MAC_ADDRESS" | tr -d ':')


if [ -z "\$IP_ADDRESS" ] || [ -z "\$MAC_ADDRESS" ] ; then
    echo "One or more required variables are empty. Script failed."
    exit 1
fi

JSON="{ \
\"body\":\"\$IP_ADDRESS\", \
\"title\": \"YOUR-GROUP-NUMBER\" \
}"

/usr/bin/curl -k -H 'Content-Type: application/json' -u YOUR-GITEA-USER:YOUR-GITEA-PASS --data "\$JSON" http://GITEA-URL/api/v1/repos/YOUR-GITEA-USER/inventories/issues
EOF

RUN chmod +x  /var/tmp/network-info.sh

RUN cat <<EOF > /etc/systemd/system/network-info.service
[Unit]
Description=Register Network Info onto Gitea
After=network.target
After=connect-wifi.service
ConditionPathExists=!/var/tmp/net-info-registered

[Service]
Type=simple
ExecStart=/bin/bash -c 'while true; do /var/tmp/network-info.sh && /usr/bin/touch /var/tmp/net-info-registered && break; done'

[Install]
WantedBy=default.target
EOF

RUN systemctl enable network-info.service

# Priting IPv4 address on console
RUN echo "IP: \4" >> /etc/issue

# Mandatory firewall configuration
RUN firewall-offline-cmd --zone=public --add-port=9090/tcp
EXPOSE 9090
Given the complete Containerfile, we are going to build a new container image and then push it to the Edge Container Registry.
Log into the Shared Edge Builder at 192.168.2.128 with ssh credentials USERNAME : PASSWORD
You can now build the new Container image like this (assuming there is just one Containerfile in the working directory from where you are building and that you are already logged into the Edge Container Registry):
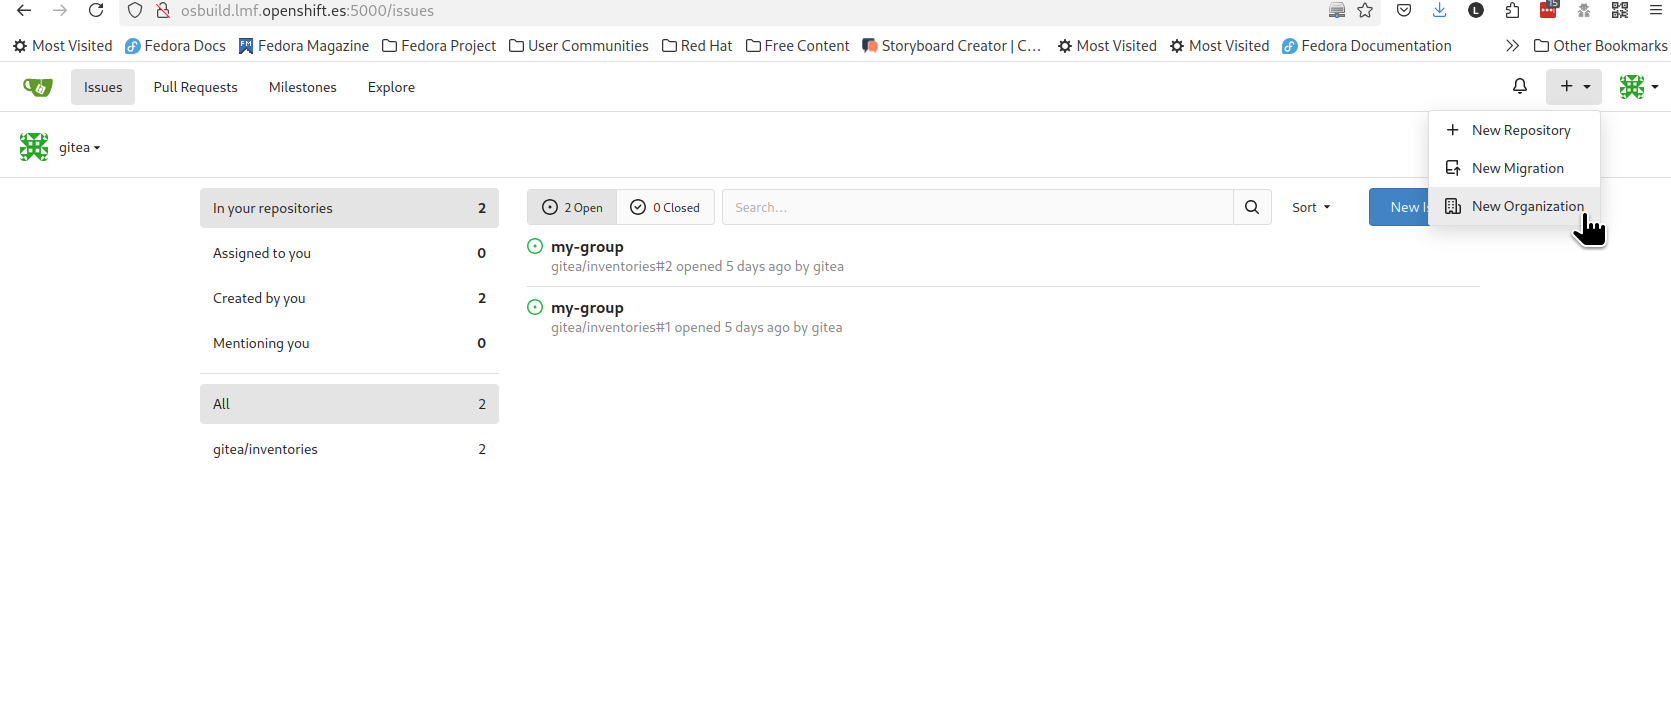
$ sudo podman build -t 192.168.2.200:5000/ID/nvidia:0.0.2 .You can now create the new Organization (following your assigned group) inside Gitea to push the newly baked container image to.
You can find that functionality here:
You would then need to log into the Edge Container Registry with the credentials used before:
$ sudo podman login 192.168.2.200:5000Now we can push it to the Container Registry like this
$ sudo podman push 192.168.2.200:5000/ID/nvidia:0.0.2 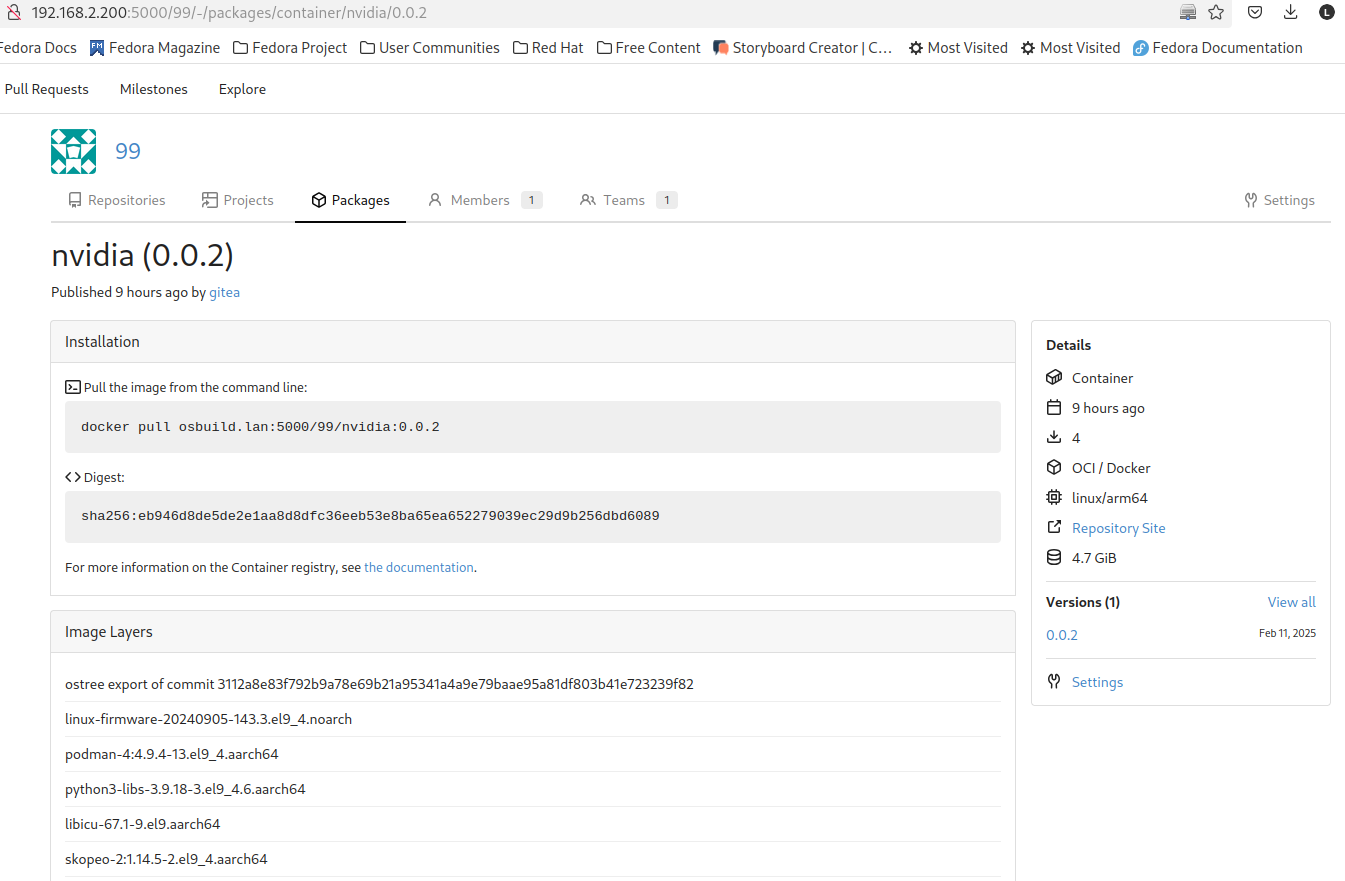
Image Deploy
Now that you have built the "refreshed" container image we need to deploy it to your own Local Edge Device sitting on your desk.
For that we need to use the bootc-image-builder as highlighted here.
In our case we would be creating an ISO image with an embedded Kickstart file (an example is found here).
The Kickstart will be defined in a TOML file and injected at building time when using bootc-image-builder.
Here we will define:
-
the disk layout in terms of partitioning
-
any additional user
-
switching the
bootcreference to the Container Registry, since the once installed from USB we would to need to point to a centralized image location -
turning off automatic updates for bootc (since we are going to want to apply the update manually)
This is the example TOML file
[customizations.installer.kickstart]
contents = """
lang en_US.UTF-8
keyboard us
timezone Europe/Rome
network --bootproto=dhcp --onboot=true --activate

user --name=admin --password=R3dh4t1! --plaintext --groups=wheel
rootpw --lock

zerombr
clearpart --all --initlabel
part /boot/efi --fstype=efi --size=200
part /boot --fstype=xfs --asprimary --size=800
part swap --fstype=swap --recommended
part pv.01 --grow
volgroup rhel pv.01
logvol / --vgname=rhel --fstype=xfs --percent=70 --name=root

halt

%post
#Switch bootc to shared registry upstream
mkdir -p /etc/containers/registries.conf.d/
cat <<EOF > /etc/containers/registries.conf.d/gitea-registry.conf
[[registry]]
location = "GITEA-URL"
insecure = true
EOF
bootc switch --mutate-in-place --transport registry GITEA-URL/YOUR-GROUP-NUMBER/nvidia:0.0.2
%end

%post
systemctl mask bootc-fetch-apply-updates.timer
%end
"""
Now we can go ahead and create the ISO image: make sure to save the above file as config.toml and create an output directory by running this on the Shared Edge Builder.
Make sure to create a config.toml file according to the example above and an output directory all in the folder you saved the previously used Containerfile.
we introduce the parameter --tls-verify=false as we are using an insecure registry.
|
$ sudo podman run --rm -it --privileged --pull=newer --security-opt label=type:unconfined_t -v /var/lib/containers/storage:/var/lib/containers/storage -v $(pwd)/config.toml:/config.toml -v $(pwd)/output:/output registry.redhat.io/rhel9/bootc-image-builder:latest --type iso --tls-verify=false --config /config.toml 192.168.2.200:5000/ID/nvidia:0.0.2
during the build process the nvidia-local repo will fail, it is normal since it is a local only repo, created for the initial image (0.0.1). The whole building process will last approximately 15 minutes, you are welcomed to either take a break or start reading about how to remotely manage this newly minted Edge Device in the next module.
|
You will find the produced ISO file in the output directory, under bootiso.
Image Rollout
Connect a USB thumbdrive to the Edge Image Builder and burn the ISO to it and get ready to boot your assigned Local Edge Device.
$ sudo dd if=output/bootiso/install.iso of=/dev/sda bs=4M status=progress oflag=syncThe automated installation will take approximately 10 minutes after which the Device will shutdown (you can check powerled and fan).
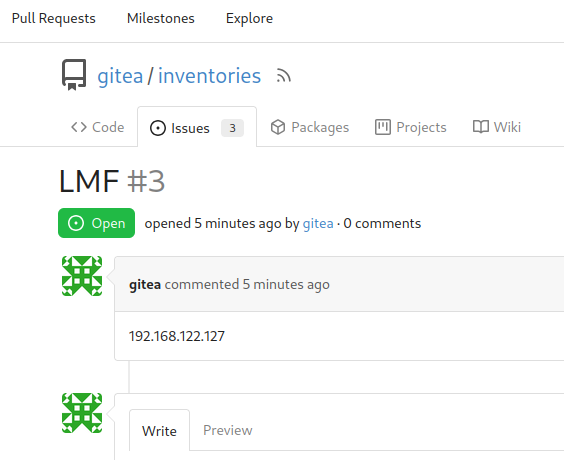
Remove the USB stick and power the Local Edge Device back on and at startup the device will post the detected IP address on Gitea, inside the inventories repo, as an issue:
You will now have access to the assigned Local Edge Device with one of the defined users (either in the Containerfile or Kickstart file) and could also access the Cockpit interface of the same.
You can now also verify that the Device is pointing to the Edge Container Registry by running the following on the Local Edge Device:
$ sudo bootc status

apiVersion: org.containers.bootc/v1alpha1
kind: BootcHost
metadata:
  name: host
spec:
  image:
    image: osbuild.lmf.openshift.es:5000/lmf/nvidia:0.0.2
    transport: registry
  bootOrder: default
status:
  staged: null
  booted:
    image:
      image:
        image: osbuild.lmf.openshift.es:5000/lmf/nvidia:0.0.2
        transport: registry
      version: 9.20241104.0
      timestamp: null
      imageDigest: sha256:baa44e2d93a6da1d79ac8b3db2181cd05ce7711cae9846015071c2e13ea44745
    cachedUpdate: null
    incompatible: false
    pinned: false
    store: ostreeContainer
    ostree:
      checksum: 6782da6b43ee72521a12f758dcde6ec3ec8c9fe31515583eb8b60a6d04c654a1
      deploySerial: 0
  rollback: null
  rollbackQueued: false
type: bootcHost|
You will see healthchecks for Microshift fail, since we have yet to include the pull-secret needed to pull container images into the Device. We can go ahead and disable Microshift for now (we will be renabling it later) |
Move on to Device Onboarding