Device Onboarding
After deployment on Day 1, you as a Platform Specalist, are faced with the challenging task of scaling this to the 1000s of devices that you would like to onboard across the different factories.
This, as part of Day 2 Operations, is what would fall under Edge Management, to ensure that these distributed systems are operating efficiently, securely, and reliably. Some of the functionalities expected by Edge Management involve overseeing the deployment, monitoring, and maintenance of Edge Devices, ensuring they are well-integrated with the overall network, and balancing resources to maximize performance and minimize latency.
However there are several challenges that this kind of solution would need to overcome:
-
the connection between the Edge Devices and the Central Management location might be intermittent, making pushing any configuration or change quite unreliable
-
in plenty of cases the Edge Device cannot be reached directly through SSH or other connection, since Firewalls at the Far Edge level are protecting from inbound connection
-
the Edge Management layer needs to be easy enough so that even non-IT specialist or non DevOps can use it to operate Devices at the Far Edge
Flight Control project was created with all of these objectives in mind.
Flight Control intro
Flight Control aims to provide simple, scalable, and secure management of edge devices and applications. Users declare the operating system version, host configuration, and set of applications they want to run on an individual device or a whole fleet of devices, and Flight Control will roll out the target configuration to devices where a device agent will automatically apply them and report progress and health status back up.
At the moment Flight Control works only on image-based Linux operating systems running bootc or ostree and with container workloads running on Podman/Docker or Kubernetes.
Some of the features of the platform:
-
Declarative APIs following GitOps principles. Although they resemble Kubernetes APIs they are not dependent on it
-
GUI to manage and monitor devices and applications oritented towards OT people and simplified for most management scenario
-
Fleet type management, allowing users to define a device template and management policy for a fleet that the system automatically applies to all current and future member devices.
-
Container or VM workloads on Podman using docker-compose or Quadlets, Kubernetes services on MicroShift using kustomize or Helm.
-
Agent-based architecture, for scalable, safe and low footprint management
-
Secure and simple device lifecycle (enrollment, certificate rotation, attestation, and decommissioning) based on hardware root-of-trust
-
Pluggable identity/authentication providers
-
Pluggable authorization providers
-
Pluggable certificate providers
Flight Control Entities
Device - A combination of a (real or virtual) machine, operating system, and application workload(s) that function together to serve a specific purpose.
Device Spec - A specification of the state (e.g. configuration) the user wants a Device to have.
Device Status - A record of the state (e.g. configuration) that the Device is reported to actually have.
Device Template - A template for Device Specs that serves to control drift between the configurations of Devices.
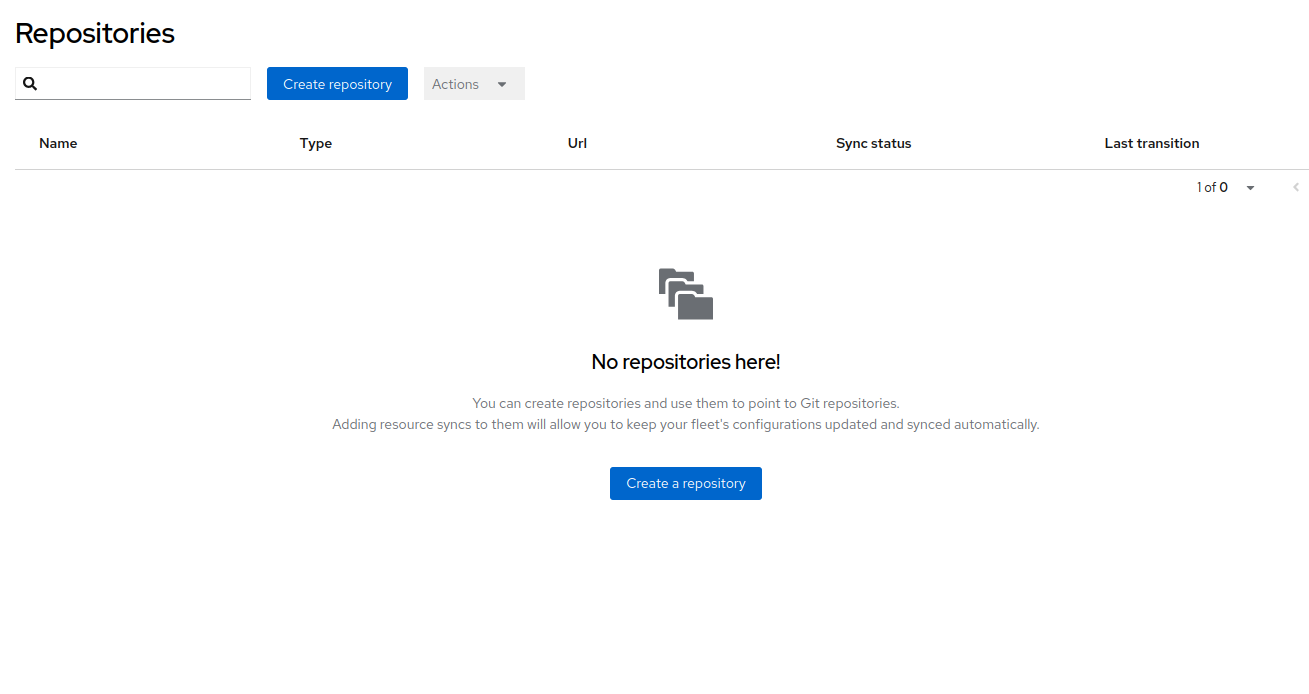
Repositories - Git repositories used a source for Template and Spec sync
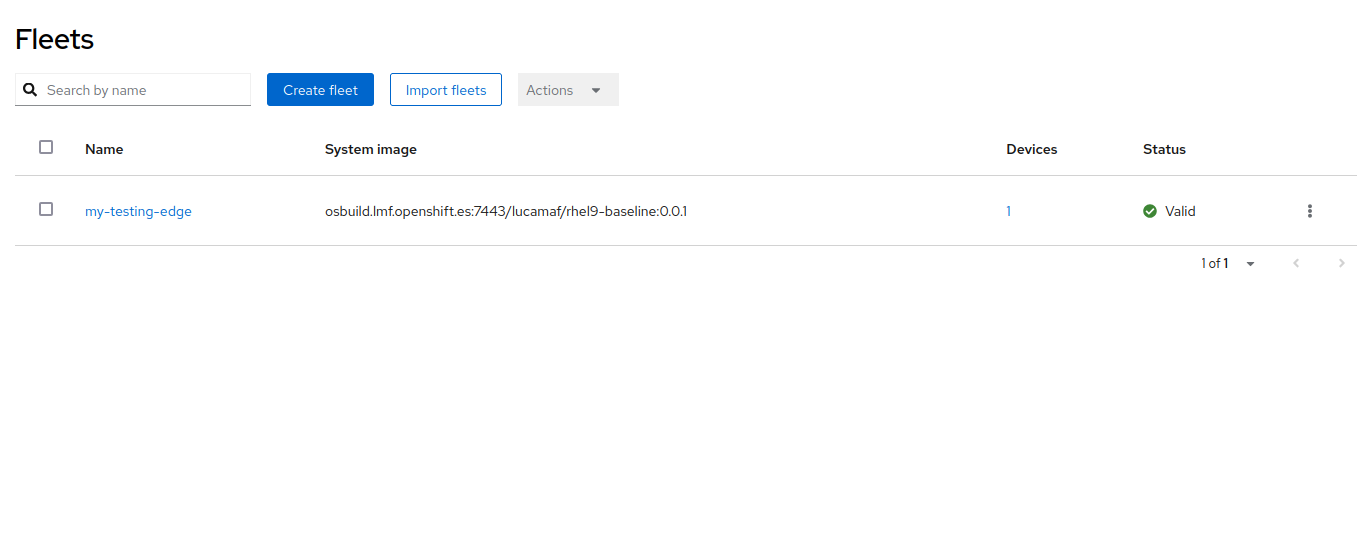
Fleet - A group of Devices governed by a common Device Template and common management policies.
Label - A way for users to organize their Devices and other resources, for example to record their location ("region=emea", "site=factory-berlin"), hardware type ("hw-model=jetson", "hw-generation=orin"), or purpose ("device-type=autonomous-forklift").
Label Selector - A way for users to group or filter their devices and other resources based on their assigned labels, e.g. "all devices having 'site=factory-berlin' and 'device-type=autonomous-forklift').
Field Selector - A way for users to filter and select Flight Control objects based on the values of specific resource fields. Field selectors follow the same syntax, principles, and support the same operators as Kubernetes Field and Label selectors.
Service - The Flight Control Service handles user and agent authentication and authorization, device enrollment and inventory, rolling out updates to devices, and rolling up status from devices.
Agent - The Flight Control Agent runs on each device and is responsible for securely enrolling into the Service, querying the Service for updates, autonomously applying these updates, and reporting status on the updates and the health of devices back to the Service.
Flight Control Architecture

The Flight Control Service consists of an API server, worker processes (not shown), and a PostgreSQL database for storing inventory and runtime information such as the current target configuration and the reported actual configuration.
The API server exposes two endpoints:
-
The user-facing API endpoint is for users to connect to, typically from the CLI or web UI. Users on this endpoint must authenticate with the configured external authentication service to obtain a JWT token. They can then use this token when making requests via HTTPS.
-
The agent-facing API endpoint is for agents to connect to and is mTLS-protected. That is, the service authenticates the device based on its X.509 client certificates. The device’s unique certificate is bootstrapped during enrollment based on hardware root-of-trust, meaning the private key is protected by the TPM and so the client certificate cannot be used by another entity. Certificates are automatically rotated before they expire.
The Flight Control Service talks to various external systems to authenticate and authorize users, get mTLS certificates signed, or query configuration for managed devices.
The Flight Control Agent is a process running on each managed device. It always "calls home" to the Service, so the device can be on a private network or have a dynamic IP address. The agent handles the enrollment process with the service and periodically polls the Service for a new target configuration. It also periodically sends a heartbeat to the Service and notifies the Service when the device or application status changes relative to the desired target configuration.
When the Agent receives a new target configuration from the Service:
-
it downloads all required assets (OS image, application container images, etc.) over the network to disk, so it doesn’t depend on network connectivity during the update
-
updates the OS image by delegating to bootc (or rpm-ostree)
-
updates configuration files on the device’s file system by overlaying a set of files sent to it by the Service
-
if necessary, reboots into the new OS, otherwise signals services to reload the updated configuration
-
updates applications running on Podman or MicroShift by running the necessary commands.
If applying any of these changes fails or the system does not return online after reboot (detected greenboot health-checks and optionally user-defined logic), the Agent will rollback to the previous OS image and configuration.
As the target configuration for devices and device fleets is declarative, users can store it in a Git repository that the Flight Control Service can periodically poll for updates or can receive updates from a webhook.
Flight Control deployment
You will now install Flight Control in your own namespace so that you can control your edge devices in your Fleet.
Make sure you have installed oc and helm cli on your own machine. You can find them here https://console-openshift-console.apps.CLUSTER_DOMAIN/command-line-tools
Login to the shared lab OpenShift cluster using the provided username and password USERNAME:PASSWORD from your Workstation.
Install the suggested version of Flight Control into the cluster by running
$ oc new-project USERNAME
$ helm upgrade --install --version=0.4.0 \
    --namespace USERNAME \
    flightctl oci://quay.io/flightctl/charts/flightctl
you might see flight-ui pod in CrashLoop, because it didn’t catch up with api pod status. Feel free to kill the pod, so that it can become Ready again.
|
You can now verify that Flight Control Service is up and running:
$ oc get pods -n USERNAME

NAME                                 READY   STATUS    RESTARTS        AGE
flightctl-api-7b64b94b64-67stg       1/1     Running   5 (7m34s ago)   10m
flightctl-db-5bcb9bc55c-fcgz4        1/1     Running   0               10m
flightctl-kv-0                       1/1     Running   0               10m
flightctl-periodic-84d6fd99f-gzmwm   1/1     Running   4 (8m11s ago)   10m
flightctl-ui-68b74c8d59-j7ktn        1/1     Running   0               5m8s
flightctl-worker-65944b5565-8ztjf    1/1     Running   4 (7m39s ago)   10m
keycloak-667675fbf9-pmv8q            1/1     Running   0               10m
keycloak-db-0                        1/1     Running   0               10m
The deployed Flight Control include a Keycloak to authenticate to the Server itself. You can find the credentials for the created admin user and demo-user for Flight Control in the relative Secrets.
$ oc project USERNAME
$ oc get secret/keycloak-demouser-secret -o json | jq .data.username | base64 -di
$ oc get secret/keycloak-demouser-secret -o json | jq .data.password | base64 -di
You can then access Flight Control GUI using the retrieved demo-user credentials at the following URL
$ oc get route/flightctl-ui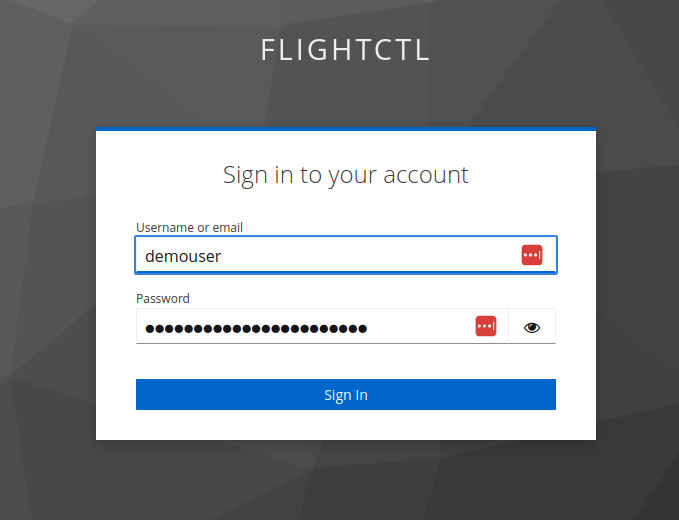
You can now install Flight Control CLI since you will need that to generate the base agent configuration.
Select the appropriate Flight Control CLI binary for your OS (linux or darwin) and CPU architecture (amd64 or arm64), download the flightctl binary to your Workstation, rename it to flightctl and make it executable, move it into a location within your shell’s search path.
$ FC_CLI_BINARY=flightctl-linux-amd64
$ curl -LO https://github.com/flightctl/flightctl/releases/download/latest/${FC_CLI_BINARY}
$ echo "$(curl -L -s https://github.com/flightctl/flightctl/releases/download/latest/${FC_CLI_BINARY}-sha256.txt)  ${FC_CLI_BINARY}" | shasum --check
$ mv "${FC_CLI_BINARY}" flightctl && chmod +x flightctl
$ sudo cp flightctl /usr/bin
Finally you can login to Flight Control API Server from your Workstation and verify you have access by querying for available Devices
$ flightctl login https://api.USERNAME.apps.CLUSTER_DOMAIN --web --insecure-skip-tls-verify
$ flightctl get devices

NAME ALIAS OWNER SYSTEM UPDATED APPLICATIONS LAST SEEN|
Should you not have any DISPLAY environment specified on your Workstation, you can also login just using CLI on terminal |
Image Manage
Image Base OS allow the whole Edge Platform (from OS up to Application) to be versioned, deployed, and updated as a single unit. This:
-
reduces operational risk
-
minimize variability across Edge perimeter
-
increase reliability and observability of the whole Edge perimeter
Since we already have an installed bootc image on the local Nvidia Device, to include the Flight Control Agent we would just need to:
-
create a new Containerfile that layers onto the previous created base image
-
add the Flight Control agent and configuration
-
build and publish (and optionally sign) the generated OS image
-
update the local Nvidia Device and reboot it

Adding Flight Control Agent
When the Edge Device reboots, the Flight Control agent at startup expects to find its configuration in /etc/flightctl/config.yaml.
This configuration will contain:
-
the Flight Control enrollment service to connect to (enrollment endpoint),
-
the X.509 client certificate and key to connect with (enrollment certificate),
The above mentioned configuration file can be obtained from Flight Control service using the flightctl cli from your own Workstation
$ flightctl certificate request --signer=enrollment --expiration=365d --output=embedded > config.yamlThe returned config.yaml contains the URLs of the Flight Control service, its CA bundle, and the enrollment client certificate and key for the agent. It should look something like this:
enrollment-service:
  authentication:
    client-certificate-data: LS0tLS1CRUdJTiBD...
    client-key-data: LS0tLS1CRUdJTiBF...
  service:
    certificate-authority-data: LS0tLS1CRUdJTiBD...
    server: https://agent-api.flightctl.127.0.0.1.nip.io:7443
  enrollment-ui-endpoint: https://ui.flightctl.127.0.0.1.nip.io:8081
With this file available we are now ready to build the new Containerfile.
Transfer the generated files to either the Shared Edge Builder or your Local Edge Device on the created VM.
In case you want to add a virtualized your Local Edge Device, you can find the qcow2 image on the Shared Edge Builder (under /var/lib/libvirt/images/). You can transfer it to your Local Edge Device and start it like this (remember to also add insecure registry like shown here in the kickstart file)
|
sudo virt-install --import --name edge-builder --boot uefi --arch aarch64 --memory 4000 --network network=default --os-variant detect=on,name=rhel-unknown --cloud-init root-password-file=./pwdfile --disk=size=30,backing_store="/var/lib/libvirt/images/rhel-9.4-aarch64-kvm.qcow2"FROM 192.168.2.200:5000/ID/nvidia:0.0.2
RUN dnf -y copr enable @redhat-et/flightctl; \
dnf -y install flightctl-agent; \
dnf -y clean all; \
systemctl enable flightctl-agent.service
# Optional: to enable podman-compose application support uncomment below”
RUN subscription-manager repos --enable codeready-builder-for-rhel-9-aarch64-rpms; \
dnf -y install https://dl.fedoraproject.org/pub/epel/epel-release-latest-9.noarch.rpm; \
dnf -y install podman-compose; \
dnf -y clean all; \
systemctl enable podman.service
ADD config.yaml /etc/flightctl/config.yamlStart the building phase
$ sudo podman build -t 192.168.2.200:5000/ID/nvidia:0.0.2 .And push the new image to the Edge Container Registry
$ sudo podman push 192.168.2.200:5000/ID/nvidia:0.0.2 You can now update manually the Local Edge Device (remember that we disabled auto-updates with bootc). To make it effective you would need to also reboot the device.
$ sudo bootc update --check

Update available for: docker://osbuild.lmf.openshift.es:5000/lmf/nvidia:0.0.2
  Version: 9.20241104.0
  Digest: sha256:cf1221f4fc7d3618be3542fa5f55d4495c499d59b22a60c8c6ee64c7645a167f
Total new layers: 89    Size: 2.3 GB
Removed layers:   0     Size: 0 bytes
Added layers:     5     Size: 454.3 MB

$ sudo bootc update
$ sudo reboot| Since we didn’t incude the pull secret for Microshift yet, make sure we keep the microshift service disabled for now, otherwise the Greenboot will take over and reboot into the previous image version |
$ sudo systemctl disable microshiftAt reboot if you are connected to the Local Edge Device console you see something like the image below
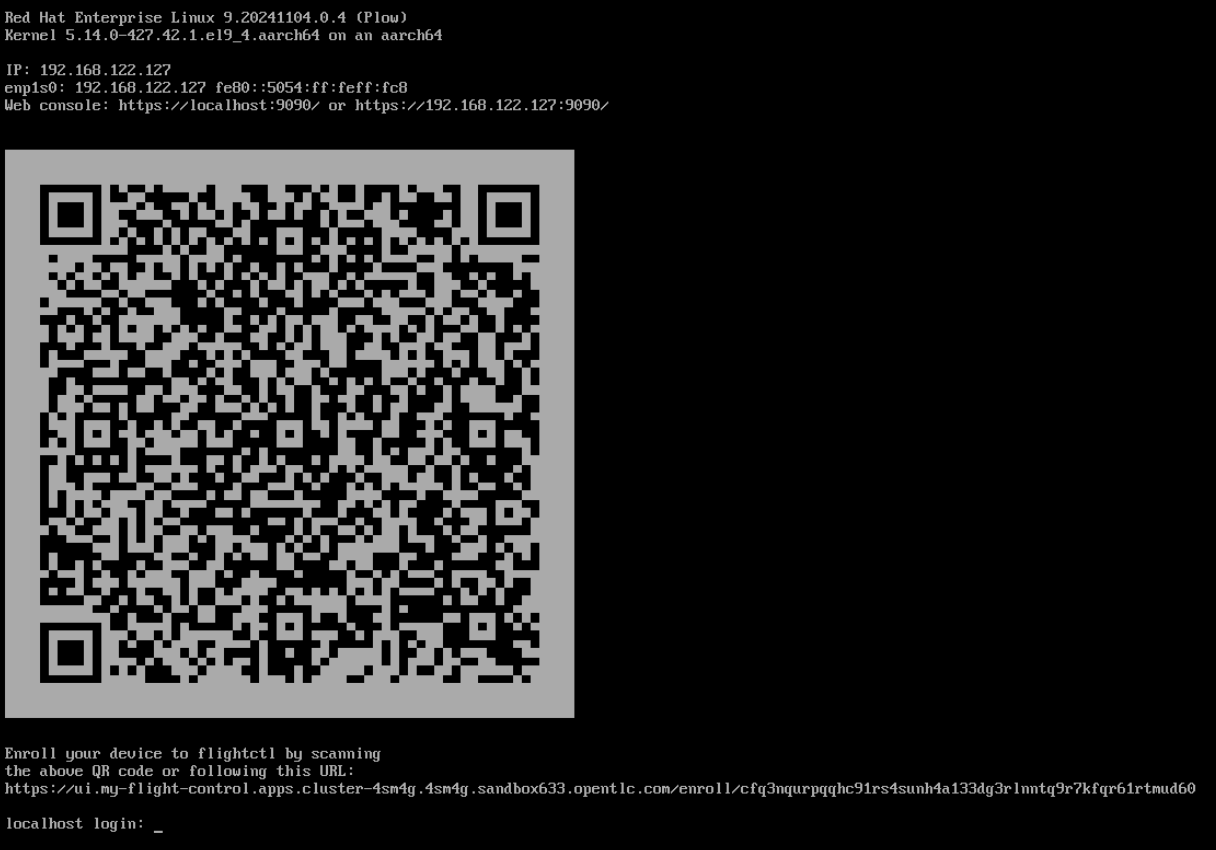
This means the device is ready for Onboarding
Device Management
The first time the Flight Control Agent runs, it generates a cryptographic key pair that serves as the device’s unique cryptographic identity. The pair’s private key never leaves the device, so that the device cannot be duplicated or impersonated. The cryptographic identity is registered with the Flight Control Service during enrollment and gets wiped during device decommissioning.
When the device is not yet enrolled, the agent performs service discovery to find its Flight Control Service instance. It then establishes a secure, mTLS-protected network connection to the Service using the X.509 enrollment certificate it has been provided with during image building or device provisioning. Next, it submits an Enrollment Request to the service that includes a description of the device’s hardware and operating system as well as an X.509 Certificate Signing Request (CSR) including its cryptographic identity to obtain its initial management certificate. At this point, the device is not yet considered trusted and therefore remains quarantined in a "device lobby" until its Enrollment Request has been approved or denied by an authorized user.
You can check for devices that are currently waiting to be approved using the cli tool:
$ flightctl get enrollmentrequests

NAME							APPROVAL	APPROVER	APPROVED LABELS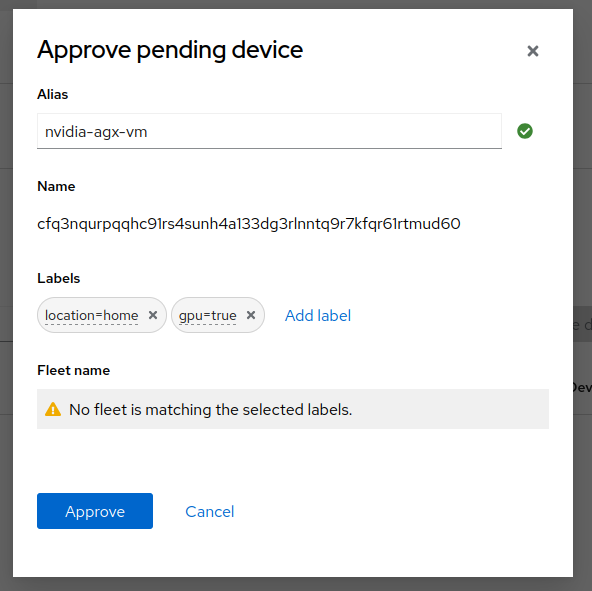
cfq3nqurpqqhc91rs4sunh4a133dg3rlnntq9r7kfqr61rtmud60 Pending <none>| The unique device name is generated by the agent and cannot be changed. By default, the agent chooses the "device fingerprint", a base32-encoded hash of the agent’s public key, as device name. |
We can now go ahead and approve the Device using the GUI
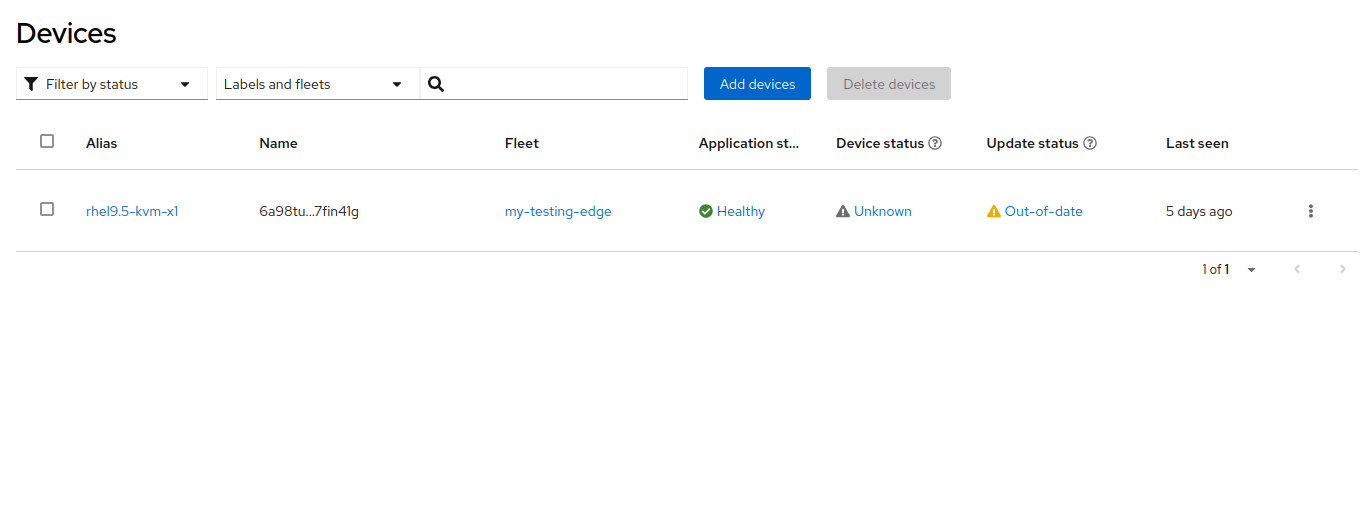
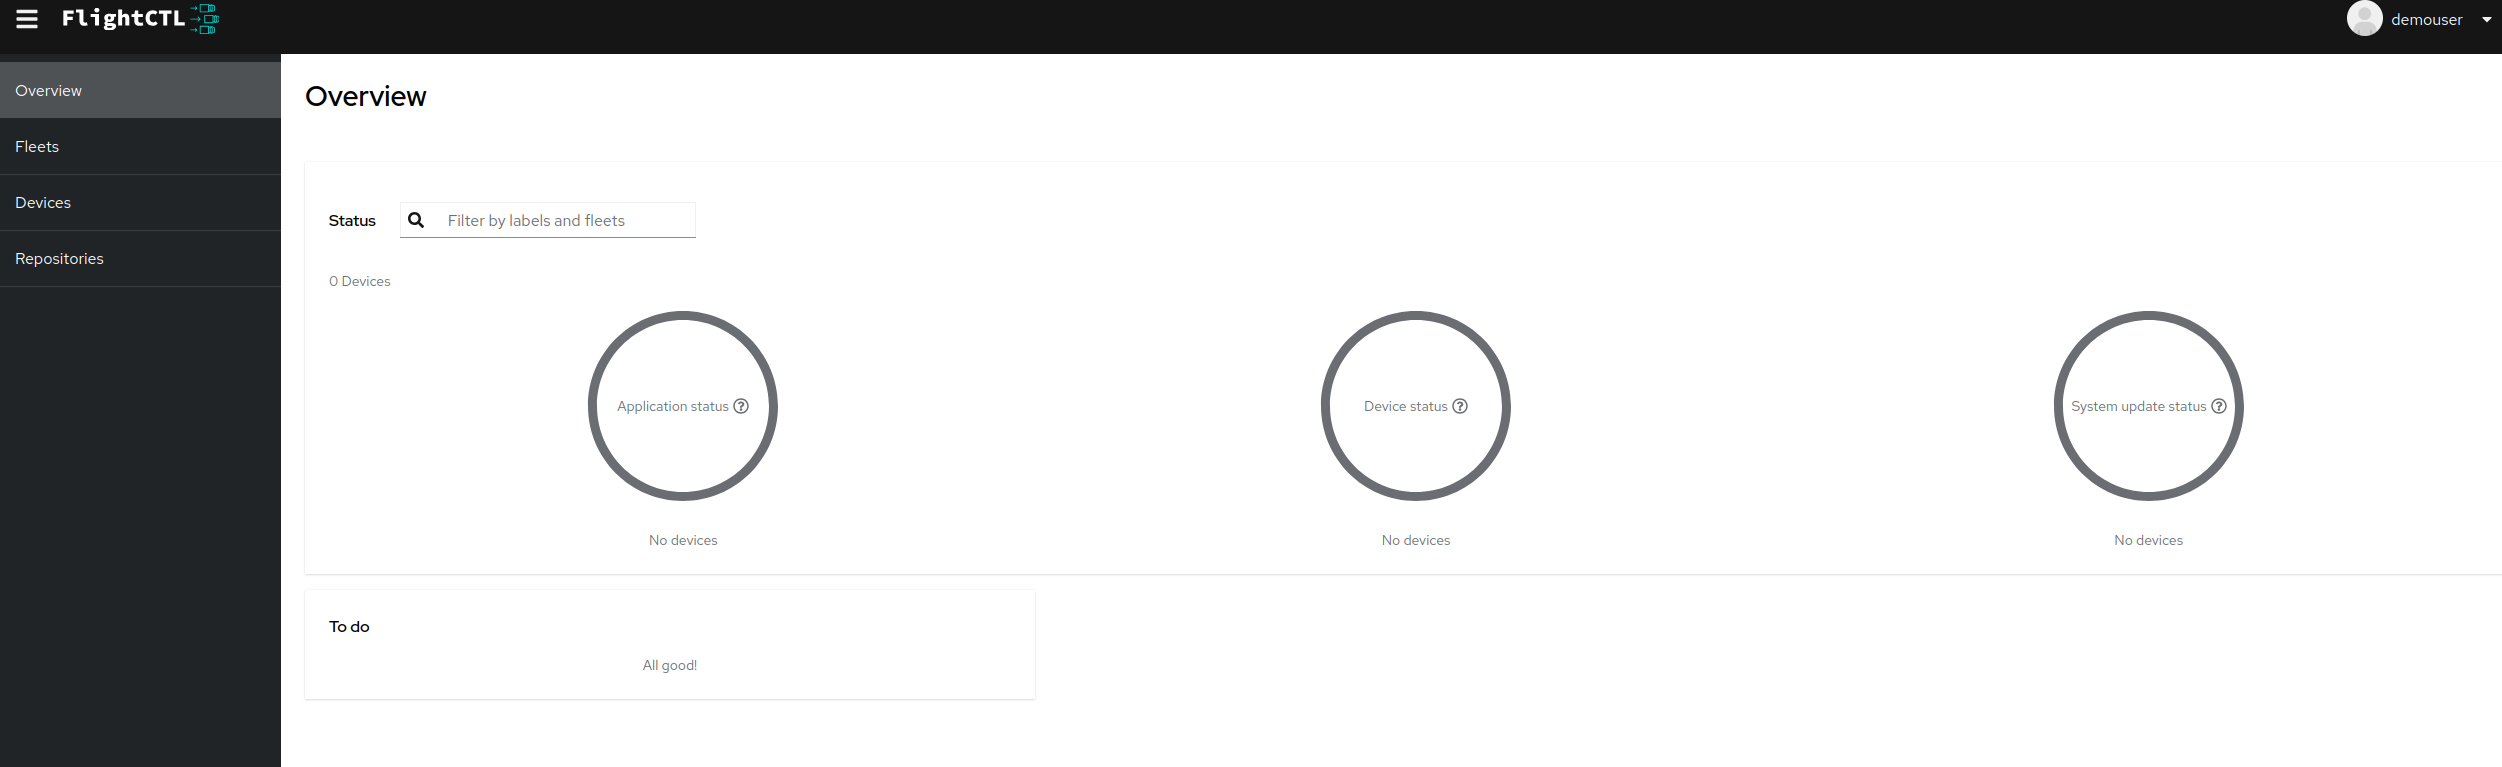
After approving the Local Edge Device you can also see the Device in the device inventory.
$ flightctl get devices

NAME							ALIAS		OWNER	SYSTEM	UPDATED		APPLICATIONS	LAST SEEN
cfq3nqurpqqhc91rs4sunh4a133dg3rlnntq9r7kfqr61rtmud60	nvidia-agx-vm	<none>	Unknown	UpToDate	Healthy		6 minutes ago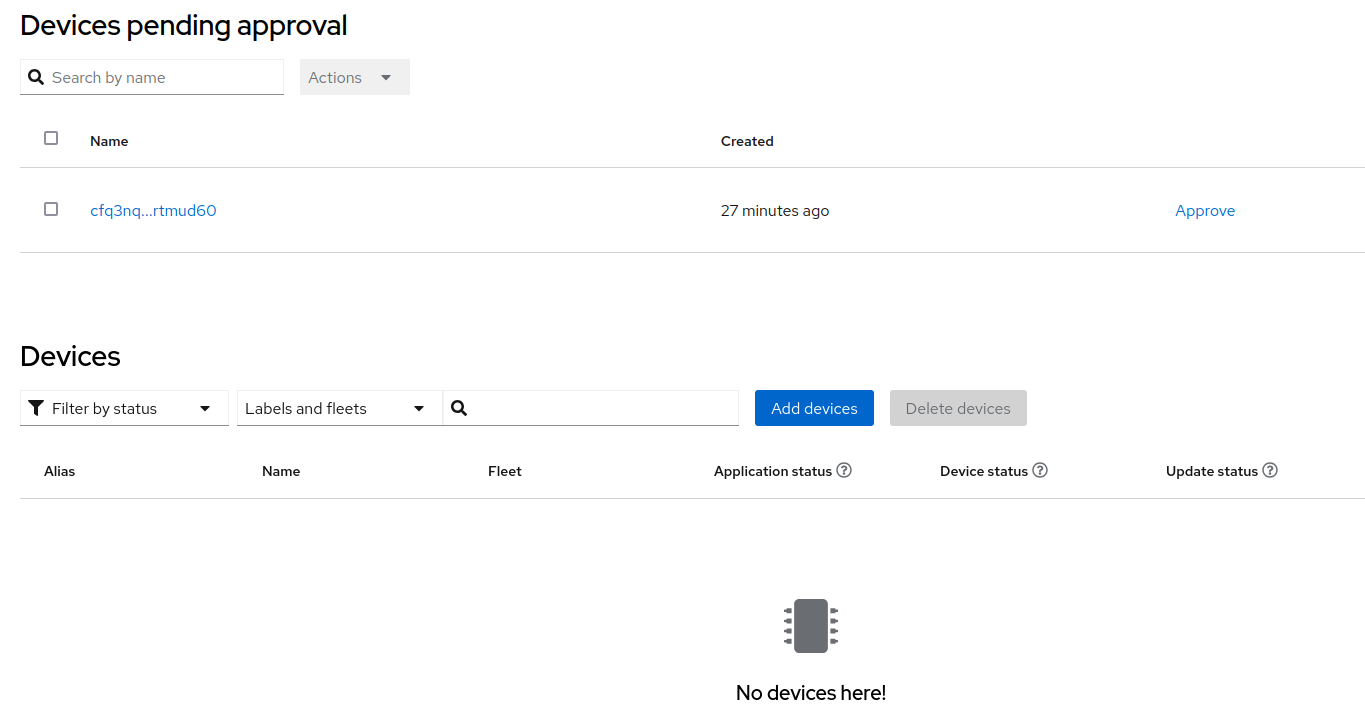

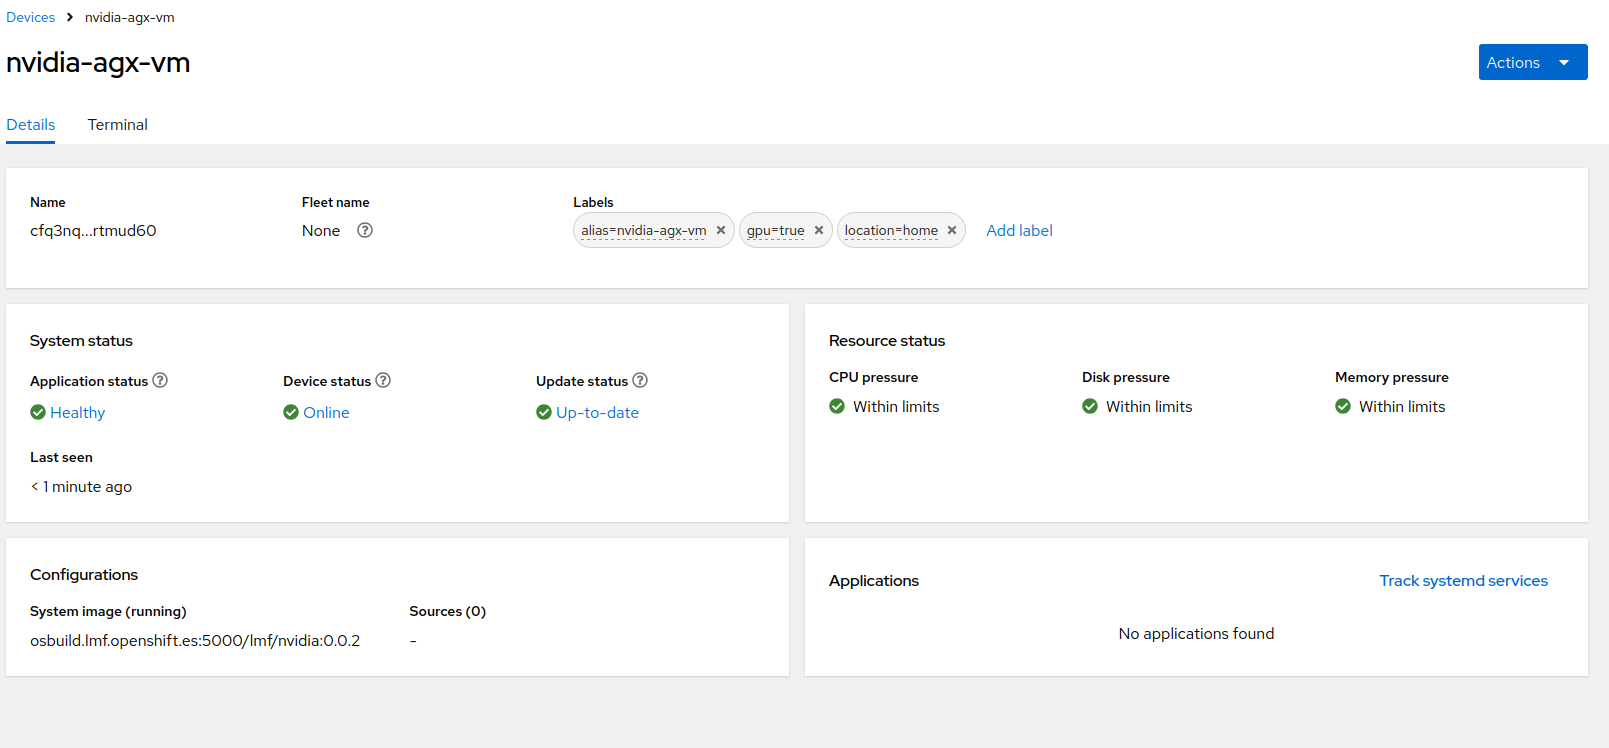
As you noticed from the interface you can also login to the Edge Device in the Terminal section
We are not going to add any target OS image since we are going to manage that as part of the Fleet.
| in case you want to recreate the device on Flight Control, you can deregister it by deleting the agent cert key in /var/lib/flightctl/certs on the Edge Device |
Fleet Management
You can now organize your devices by assigning them labels, for example to record their location ( ("region=emea", "site=factory-berlin"), hardware type ("hw-model=jetson", "hw-generation=orin"), or purpose ("device-type=autonomous-forklift").
Labels must follow certain rules to be valid (the same as for Kubernetes):
-
Keys and value must each be 63 characters or less. Value may be omitted.
-
Keys and values may consist of alphanumeric characters (a-z, A-Z, 0-9). They may also contain dashes (-), underscores (_), dots (.), but not as the first or last character.
Once devices are labeled, you can select a subset of devices by writing a "label selector", which is a comma-separated list of labels devices must have to be selected, for example site=factory-berlin,device-type=autonomous-forklift).
We are now going to create a new Fleet and make sure that it includes the just approved device.
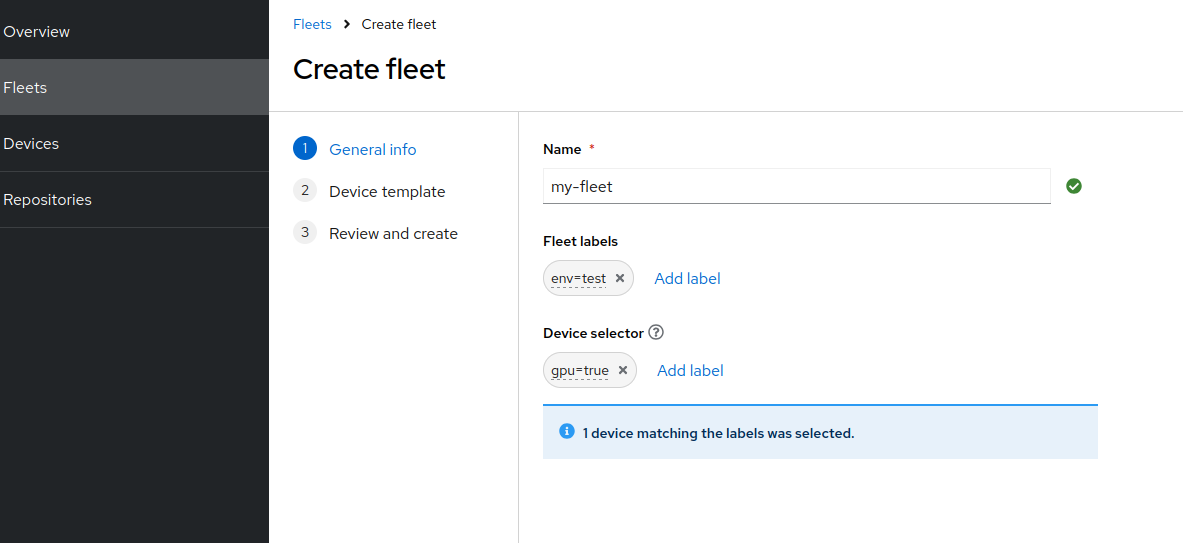

make sure to leave the ref system image empty since we will use that in the next section
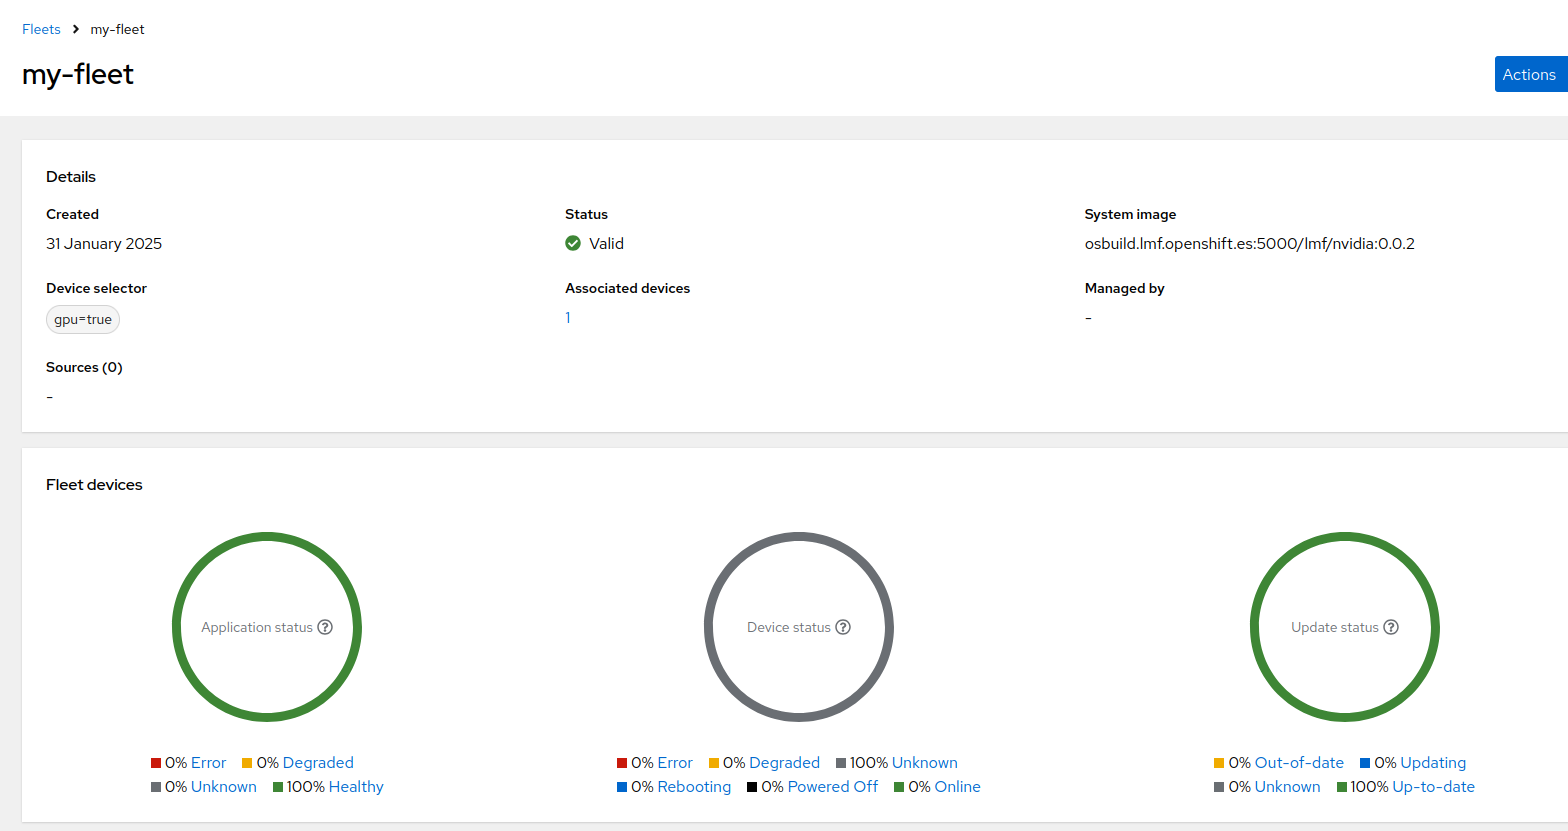
Now that you Local Edge Device is under management from Flight Control you can define the target configuration template in a declarative way and add the required predefined apps and / or OS configuration.
Move on to Day 2 Operations